
Overview
This article explains how to use the PDF import tool in the Kinsman SitePoint app to import, scale, position, and rotate a PDF plan for use on your project.
Note: The PDF import tool is available to Pro users only.
Before You Begin
Before you start, make sure you have:
Your base and rover set up and initialized.
An established control point.
The PDF plan saved in a known location on your mobile device.
Two reference points that you can identify both on the PDF and at the jobsite.
Step-by-Step Instructions
Step 1 — Prepare Your Project
Before importing your PDF, identify two reference points that are clearly visible on the plan and can also be located on the jobsite. If the plan does not include specific tie points, use known features such as the corners of an existing building.
Using your rover, locate each reference point on the jobsite and drop a point at each location in the Kinsman SitePoint app.
You'll use these points later to position and rotate the PDF so it aligns with the jobsite.
Step 2 — Open the PDF import Tool
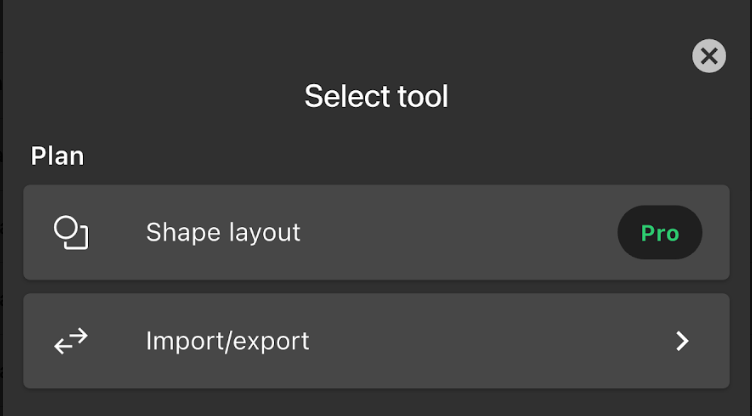
Tap Tools, then select Import/export under Plan.
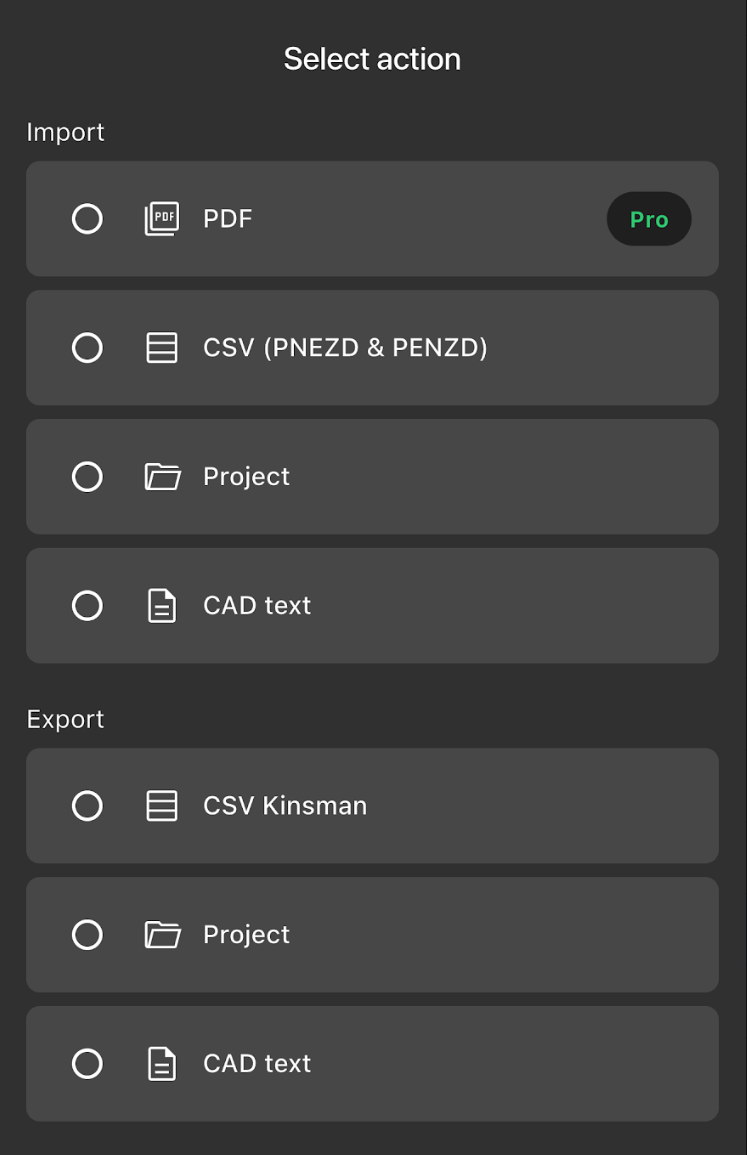
Then select PDF
Step 3 — Select your PDF
Step 3 — Select Your PDF
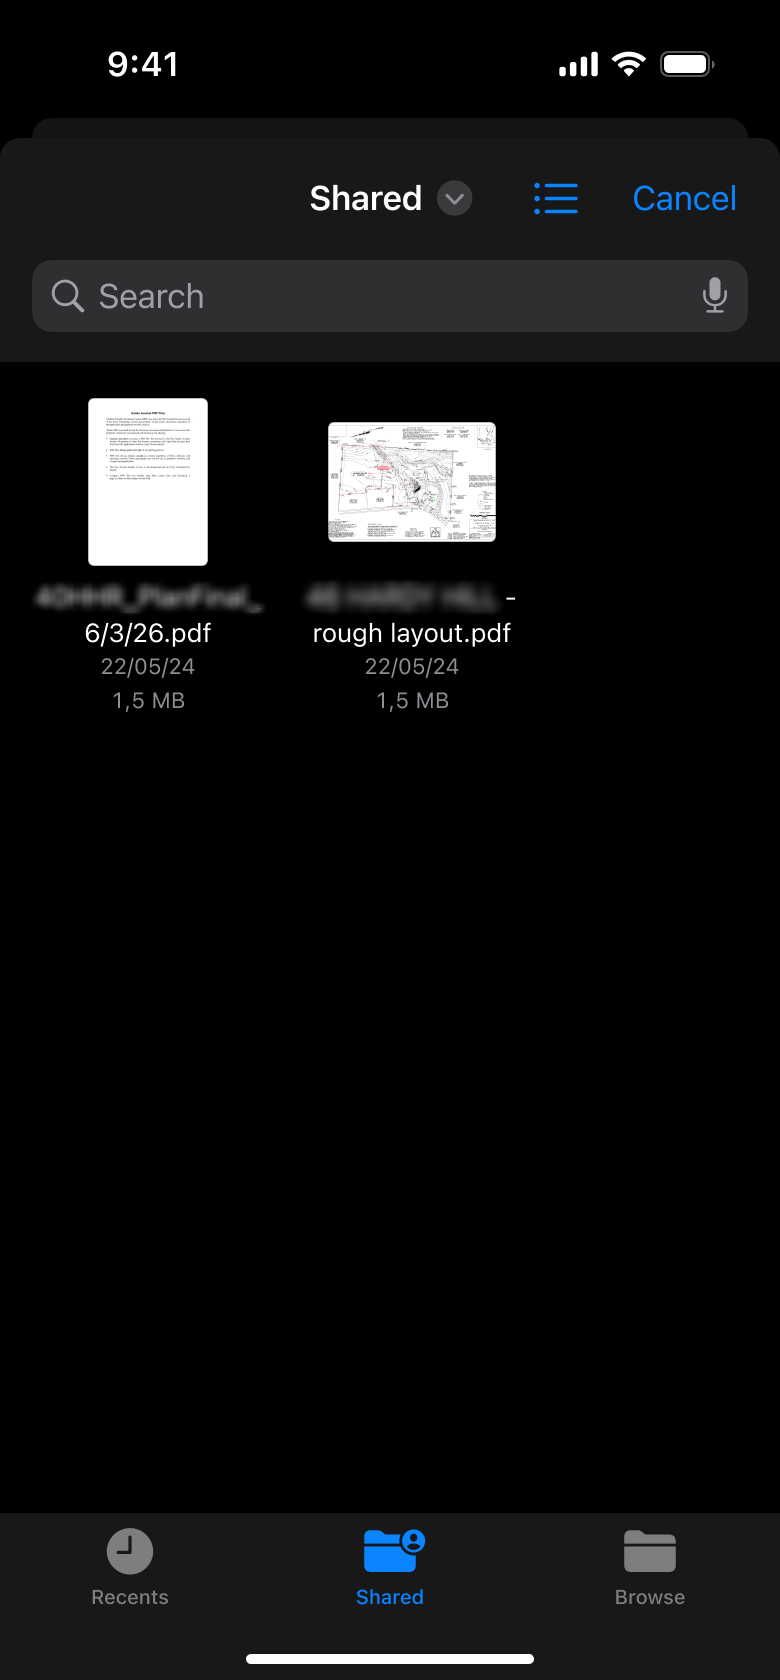
Use your device's file browser to locate and select the PDF you want to import.
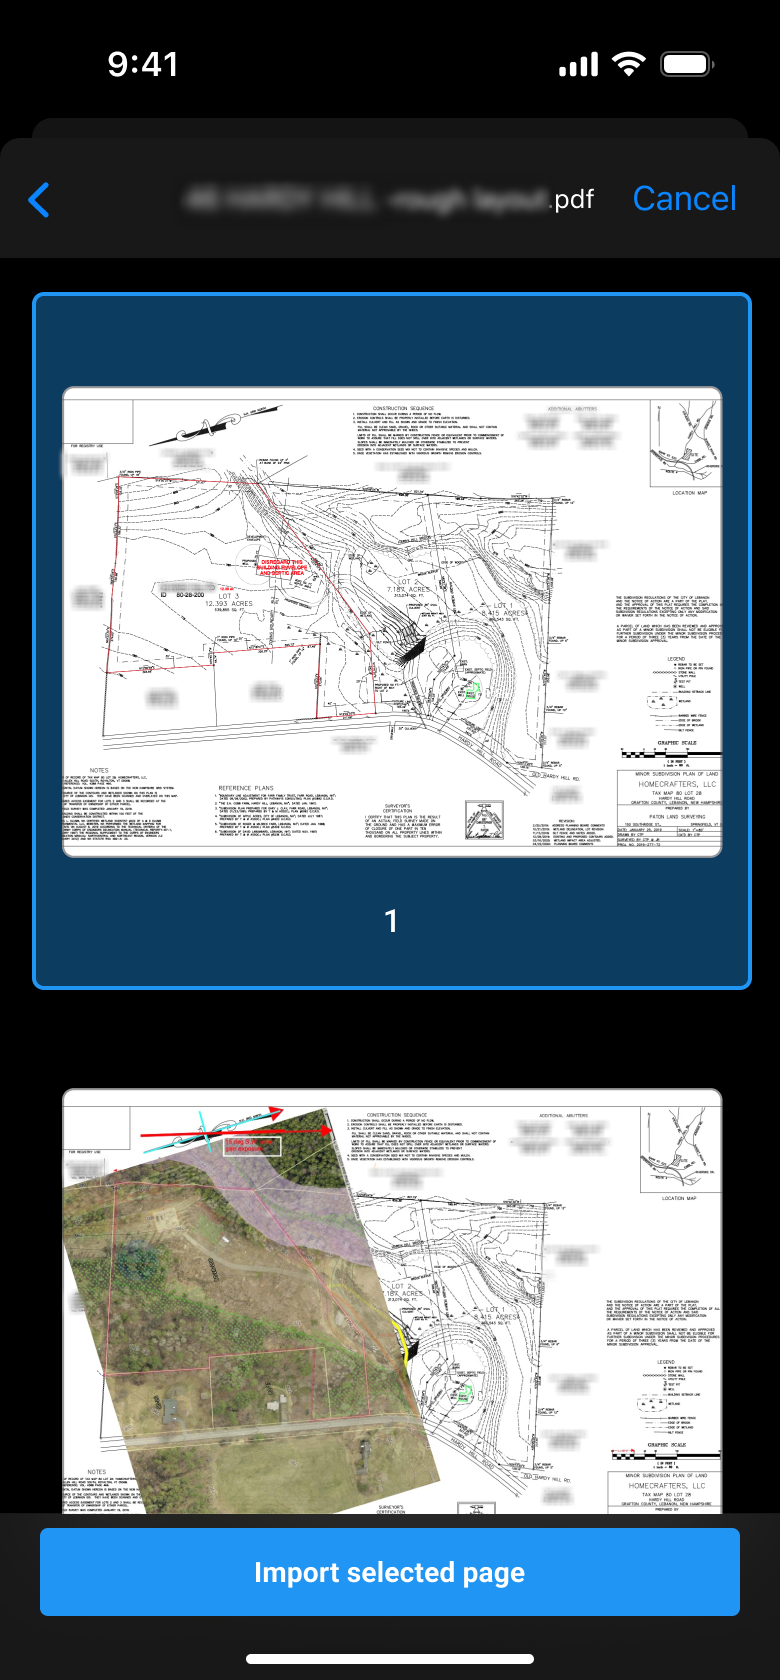
If the PDF contains multiple pages, select the page containing the plan you want to use.
Tap Import Selected Page.
Step 4 — Scaling the PDF
Step 4 — Scale the PDF
After importing the PDF, the Kinsman SitePoint app will attempt to automatically detect the plan scale.
If the scale is detected, verify that it matches the scale shown on the plan.
If the scale cannot be detected or needs to be changed, you have two options:
Enter the plan scale
Tap the feet field and enter the known scale listed on the plan.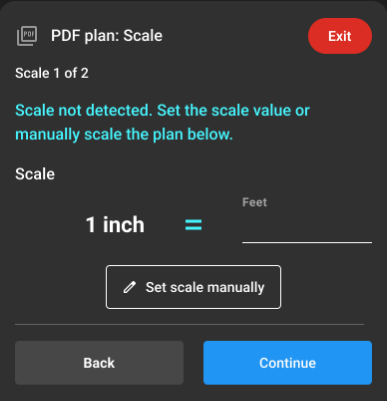
OR
Set the scale manually
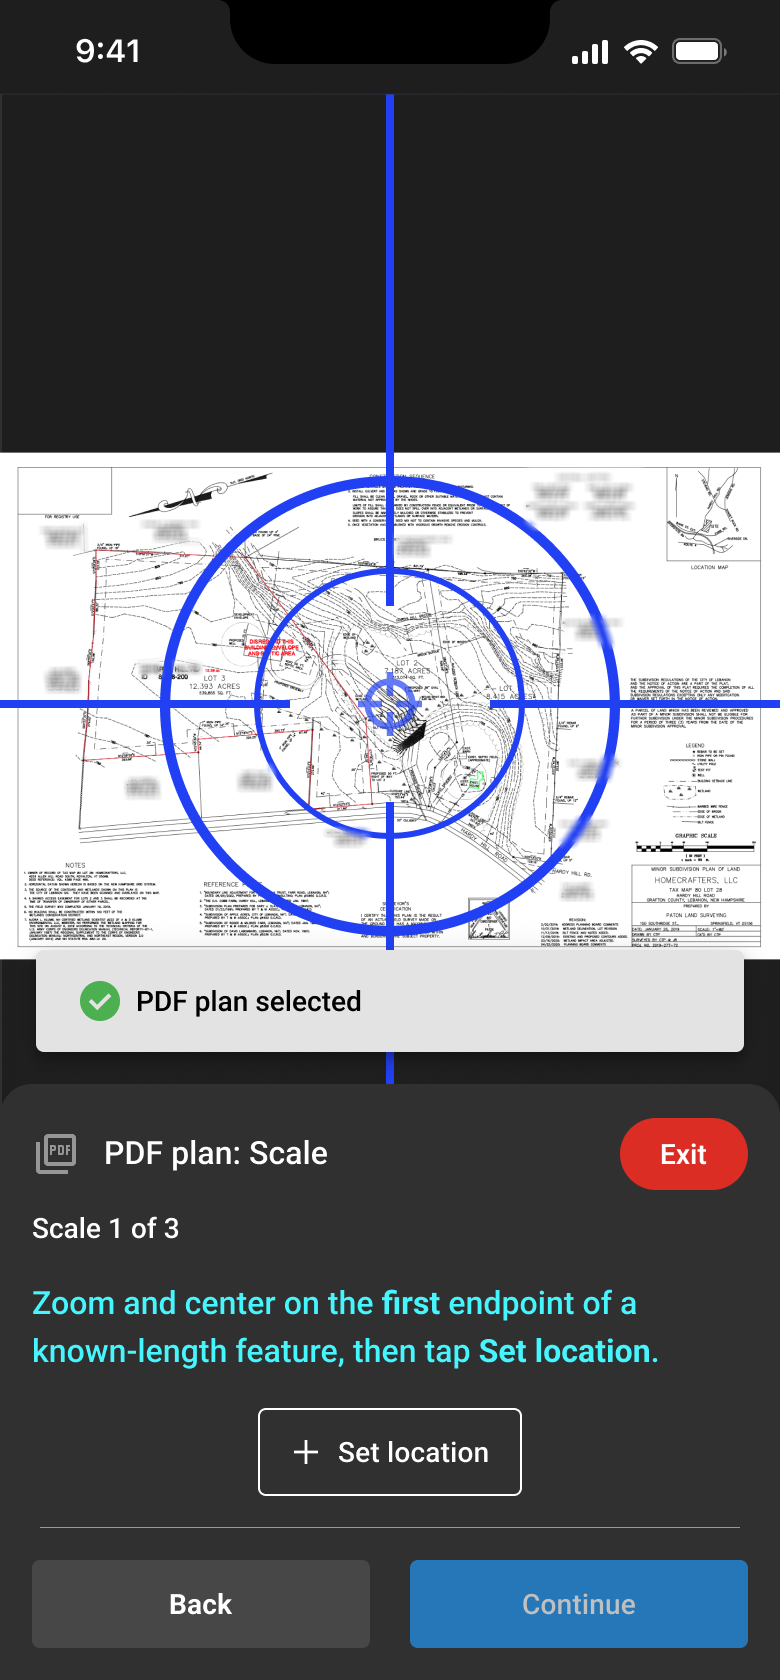
Tap Set Scale Manually to establish the scale using a known distance on the PDF.
Zoom in on one end of the known distance and position the crosshair precisely over that location. Tap + Set Location.
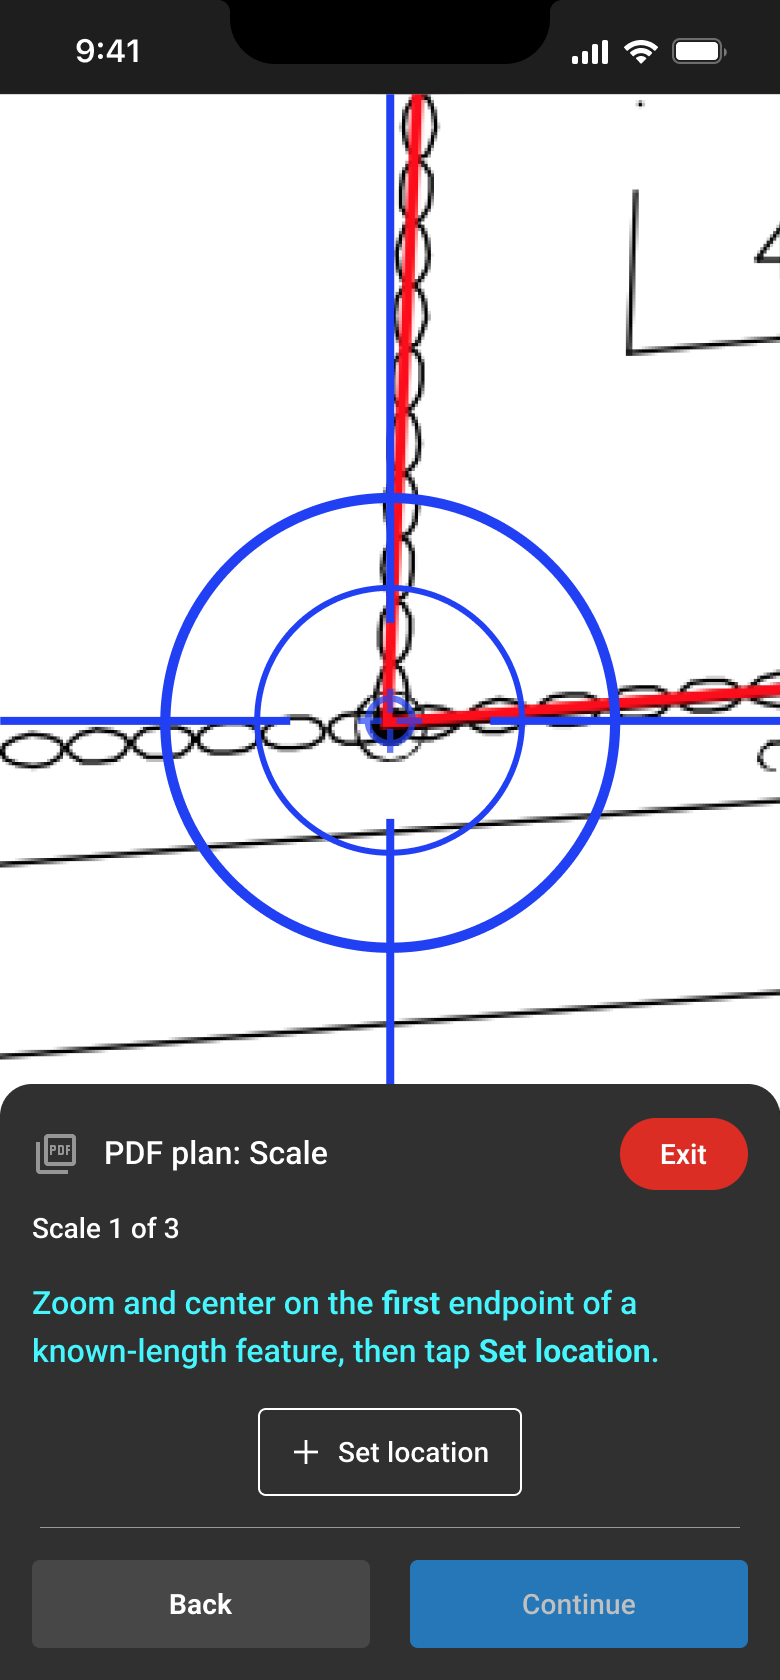
Review the placement of the S marker, then tap Continue.
Once both S markers are set, enter the actual distance between them in feet. The app will use this distance to calculate the PDF scale.
Tap Continue.
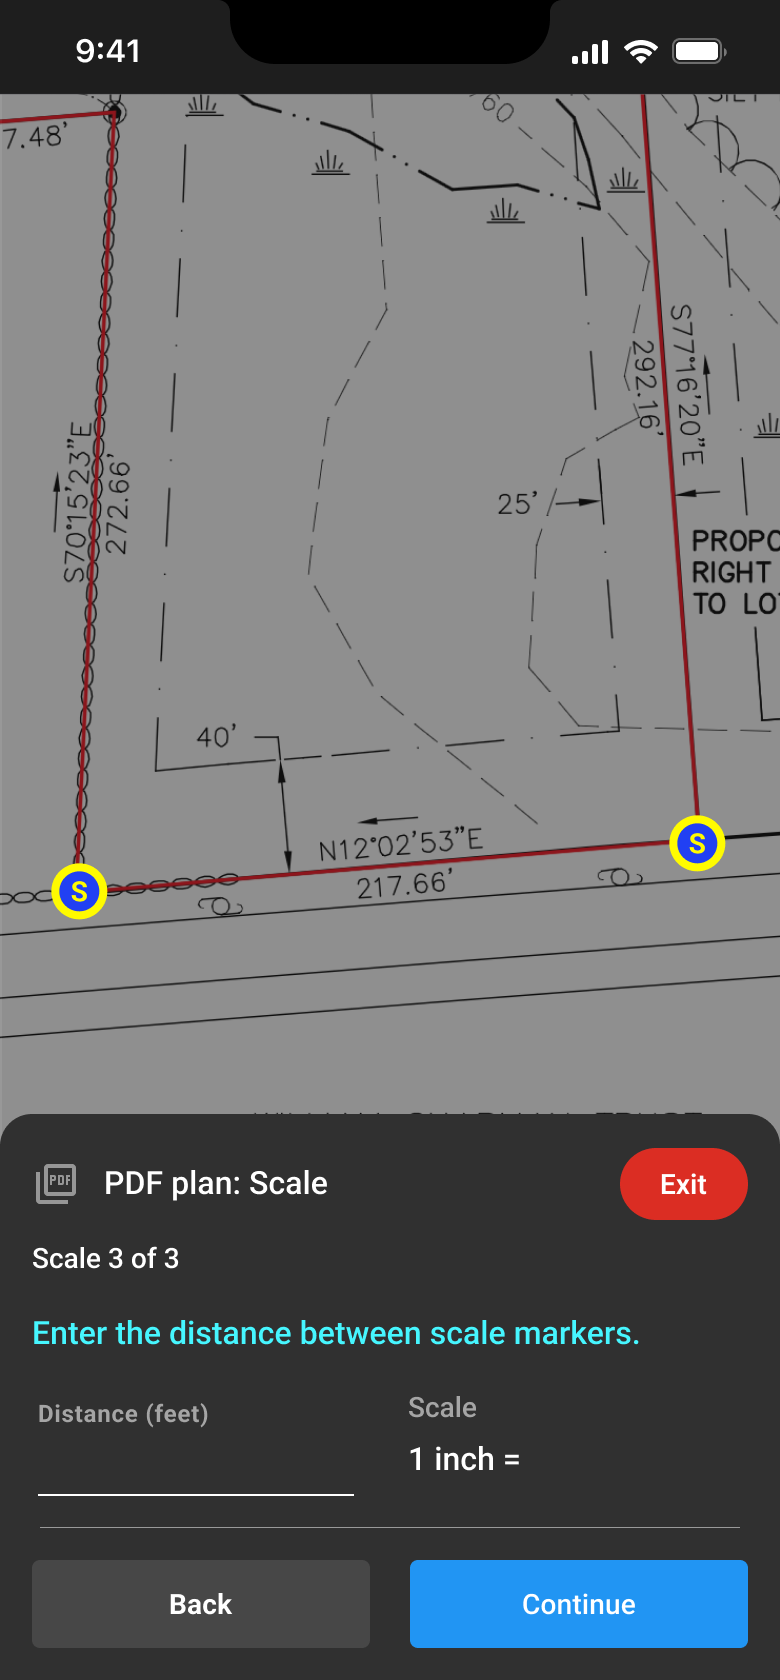
Best Practice: When setting the scale manually, use the longest known distance available on the PDF. A longer reference distance helps improve the accuracy of the plan scale.
Step 5 — Position and Rotate the PDF
With the scale set, you'll use the two reference points identified earlier to align the PDF with your jobsite.
Position the PDF
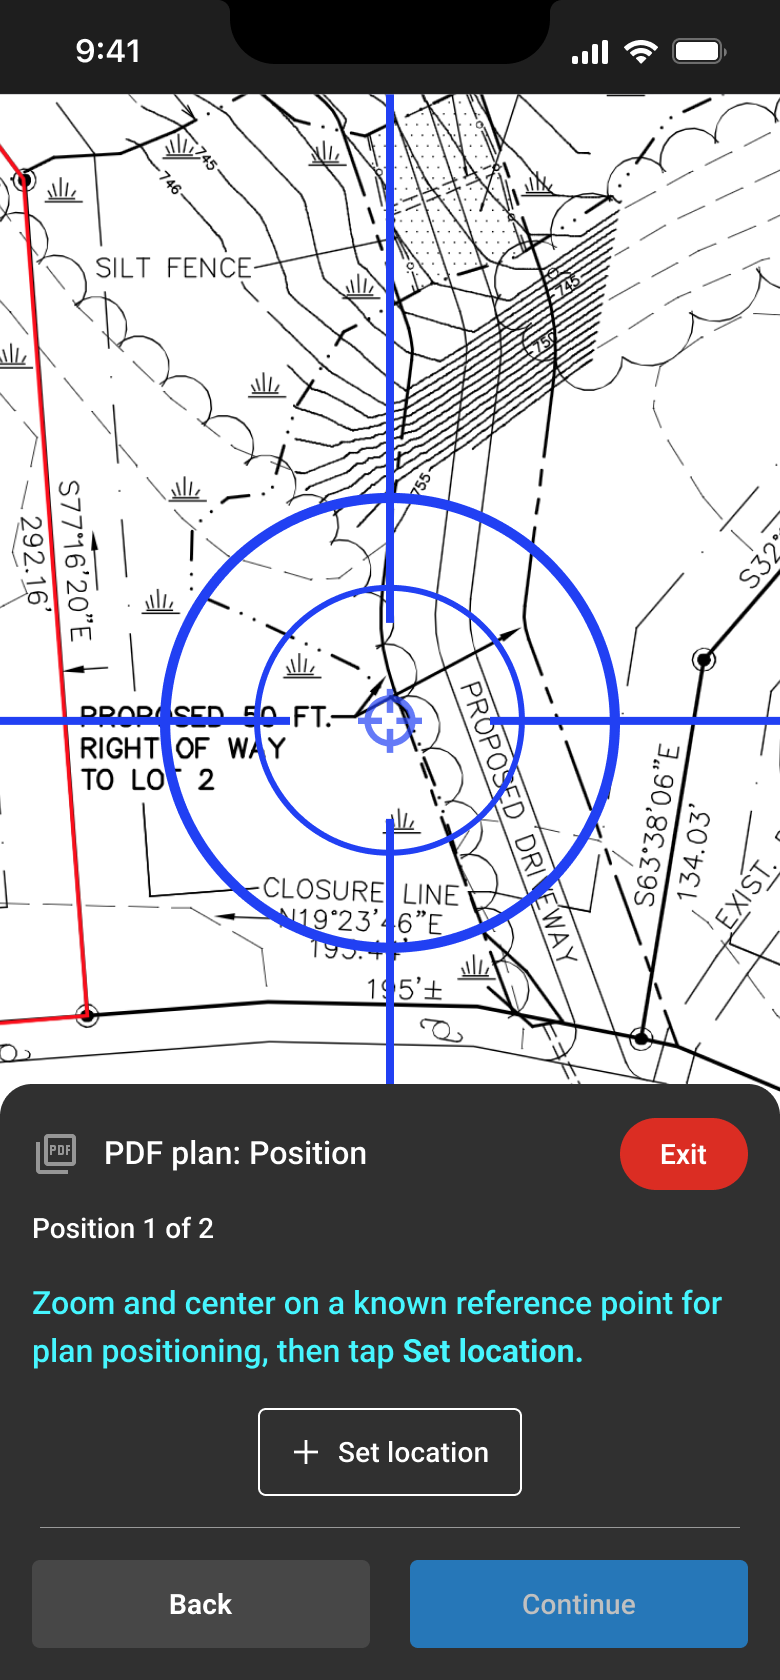
On the PDF, zoom in on your first known reference point and center the crosshair precisely over it.
Tap + Set Location.
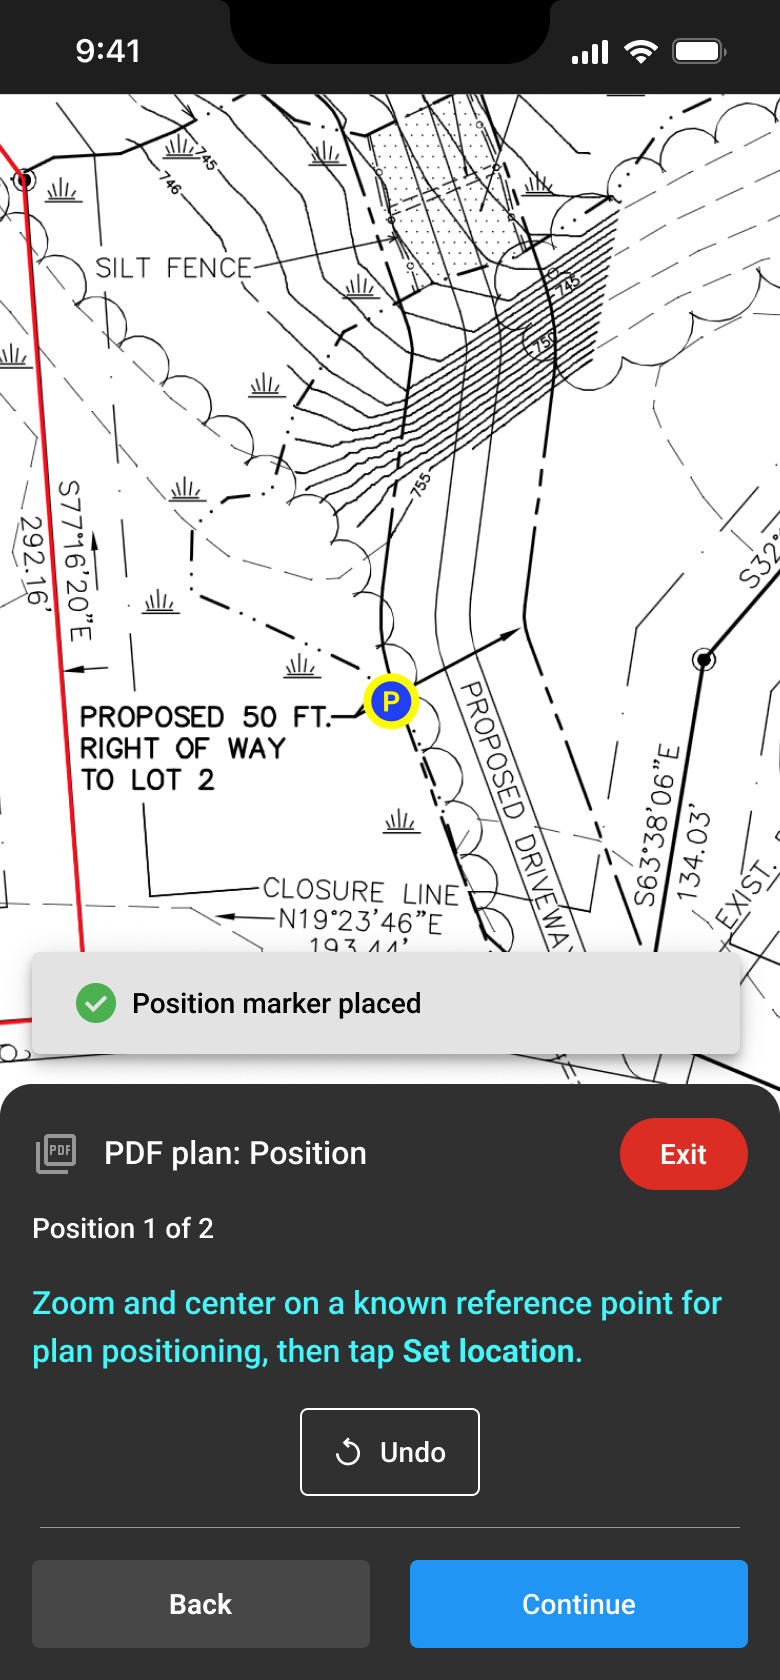
A Position marker appears at that location. Verify its placement, then tap Continue.
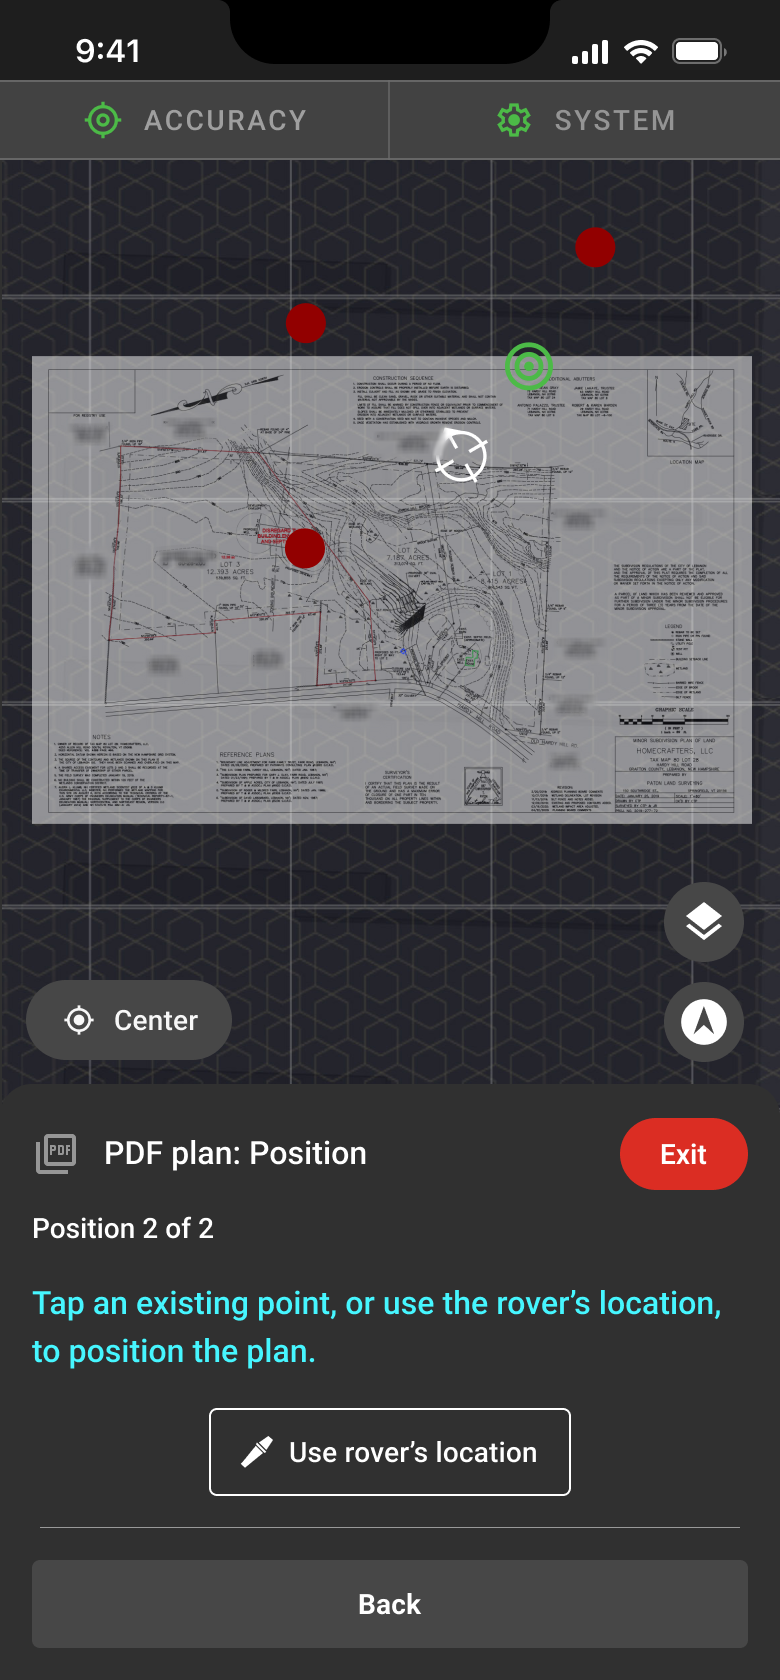
Next, select the corresponding point on the project map. The PDF will move to align the Position marker with that point.
If you did not create a point at the reference location, physically position your rover at the location and tap Use Rover's Location.
Rotate the PDF
Next, you'll use your second reference point to establish the plan's orientation.
On the PDF, zoom in on your second known reference point and center the crosshair precisely over it.
Tap + Set Location.
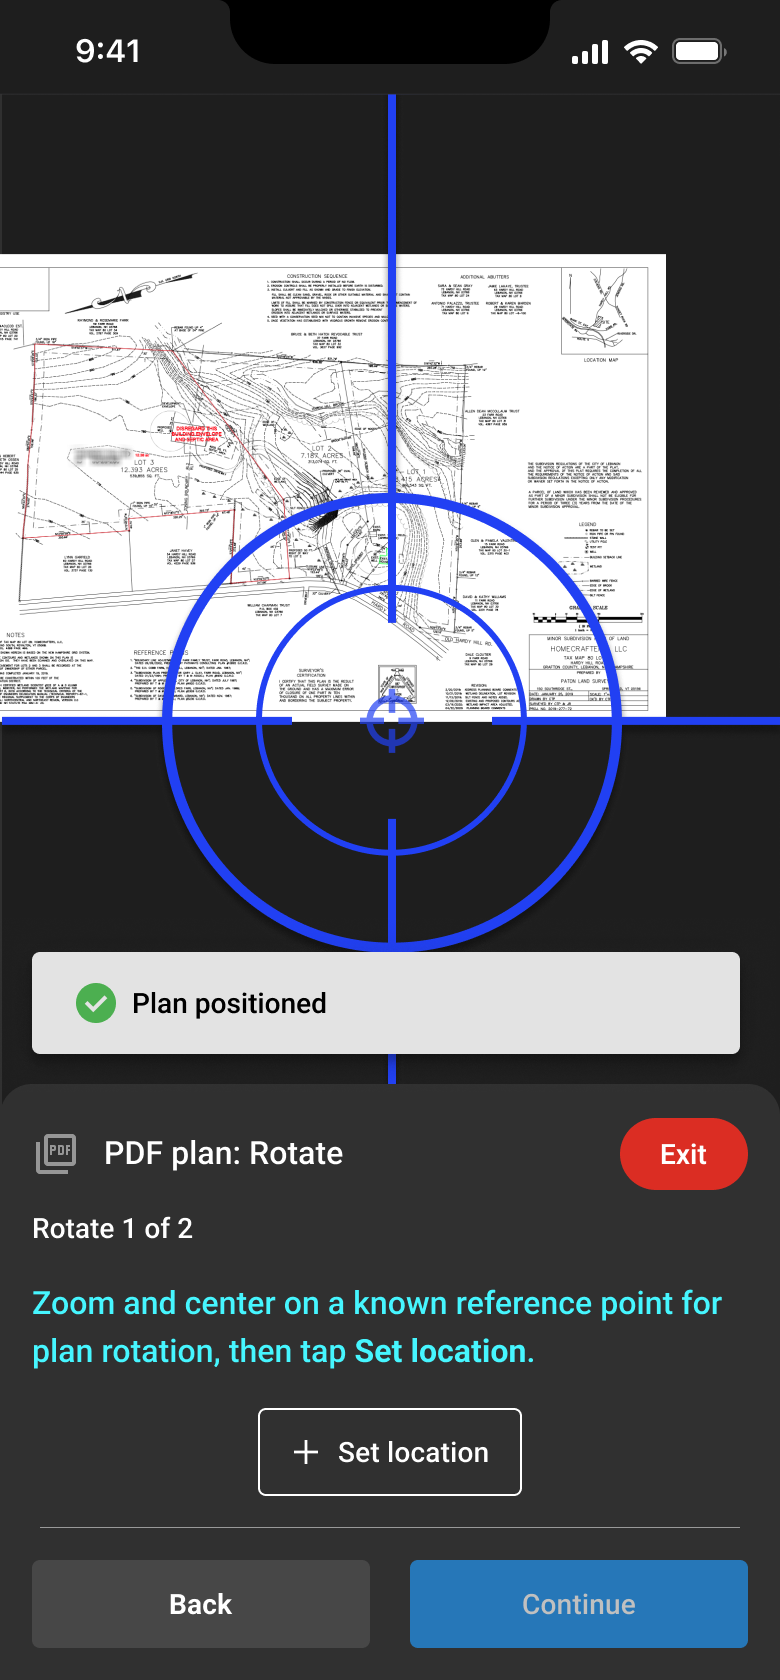
A Rotate marker appears. Verify its placement, then tap Continue.
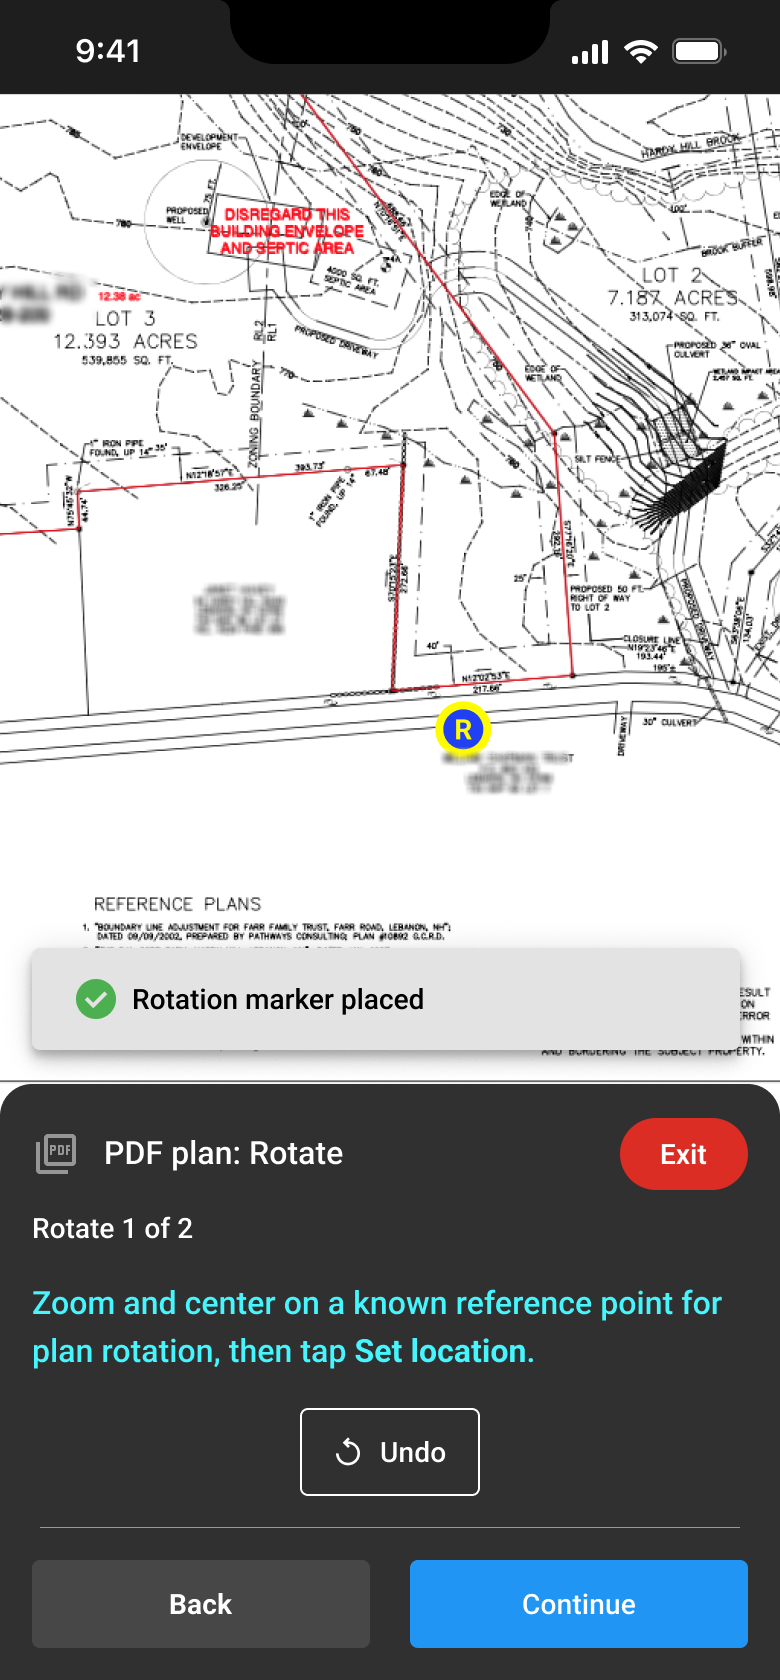
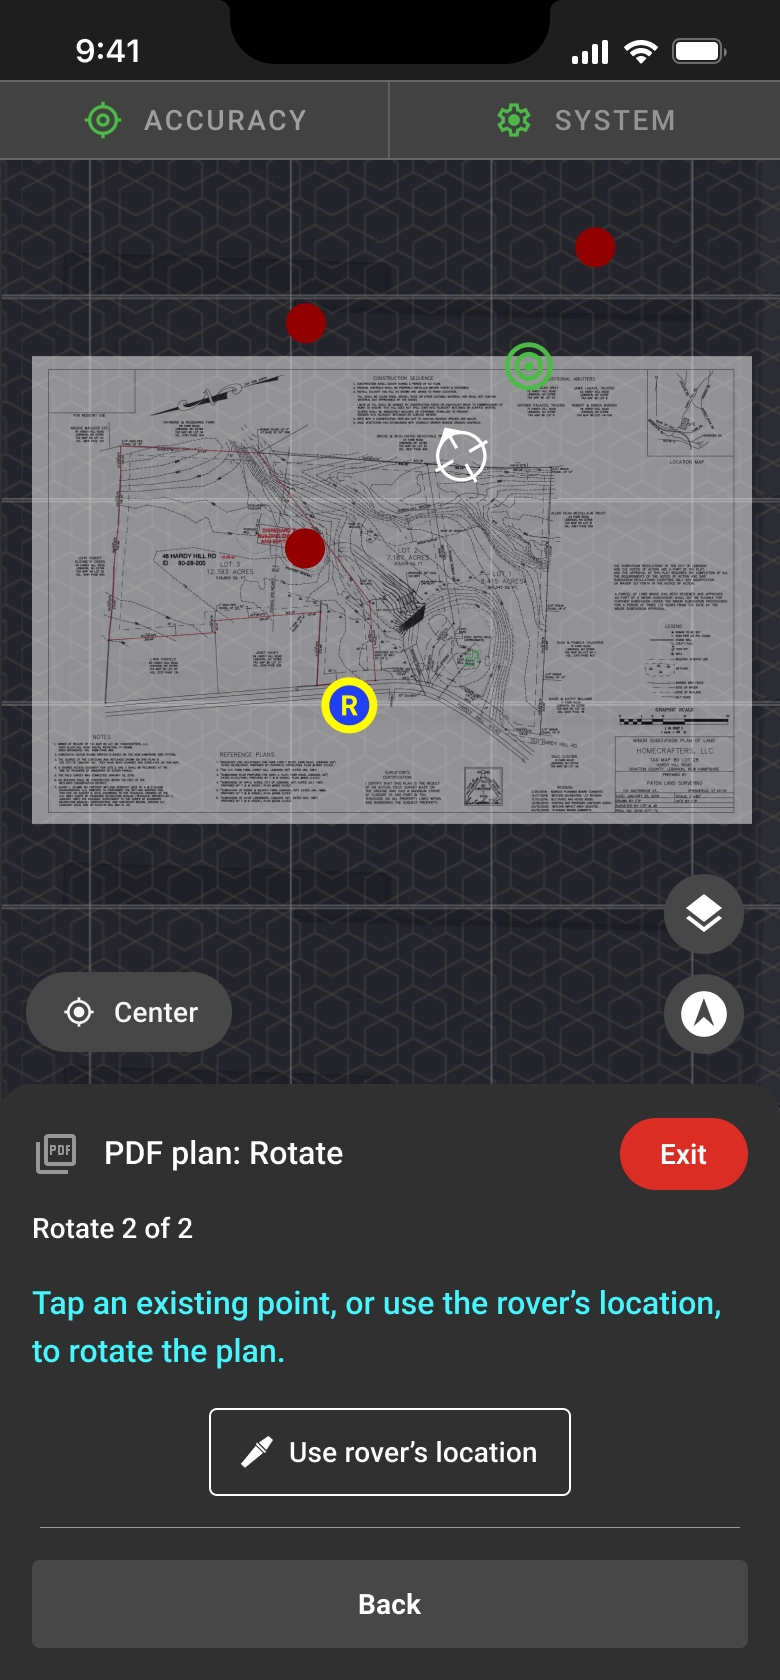
Select the corresponding point on the project map. The PDF will rotate to align the Rotate marker with that point.
If you did not create a point at the reference location, position your rover at the location and tap Use Rover's Location.
Your PDF is now scaled, positioned, and rotated to align with your jobsite.
Step 6 — Review the Import
Review the import details, including:
Plan type.
PDF name.
Plan scale.
If everything is correct, tap Done.
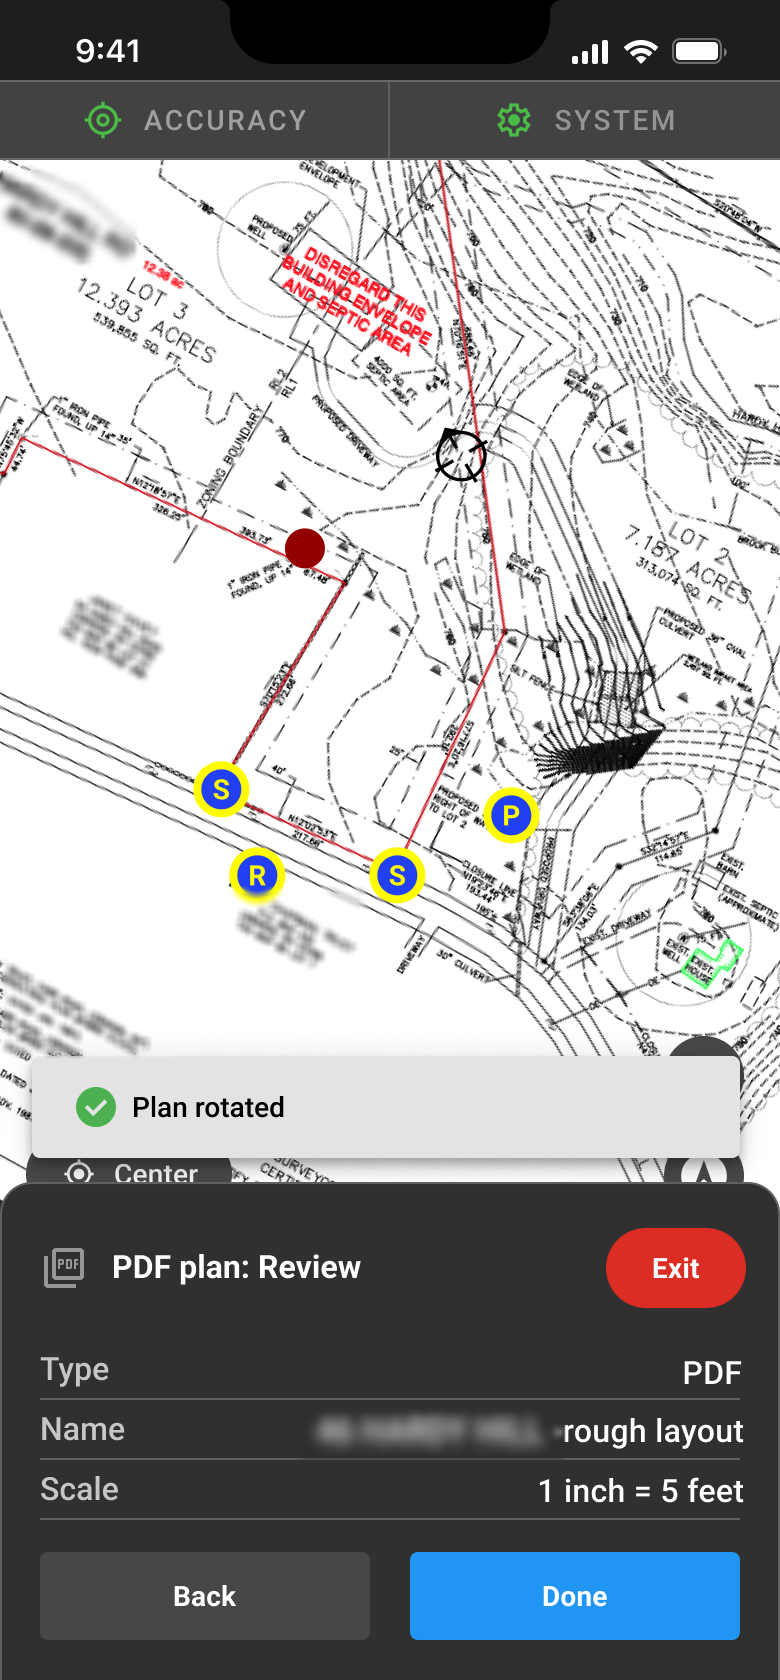
The PDF will now appear on your project map as a background layer.
You can zoom in on the plan and use features such as building corners, foundations, and other plan details as visual references while working with your rover. You can also create points, lines, and shapes over the PDF using the tools available in the Kinsman SitePoint app.
Managing Your PDF
Adjust PDF Opacity or Visibility
To adjust how the PDF appears on your map, tap Layers to open the Layers menu.
From here, you can:
Adjust the PDF's opacity.
Hide or show the PDF layer.
Hiding the PDF does not remove it from your project.
Delete a PDF
To remove an imported PDF:
Open the Layers menu.
Press and hold the PDF name.
Tap Delete.
Confirm the deletion.
Deleting the PDF removes the plan layer from your project.
Was this article helpful?
That’s Great!
Thank you for your feedback
Sorry! We couldn't be helpful
Thank you for your feedback
Feedback sent
We appreciate your effort and will try to fix the article