
Overview
This article explains how to use the Shape layout tool in the Kinsman SitePoint app to create precise shapes directly on your project map.
You can create:
Rectangles
Lines
Circles
After entering the dimensions, you can position and rotate the shape using existing project points or your rover's location.
Note: The Shape layout tool is available to Pro users only.
Before You Begin
Before you start, make sure you have:
Selected your work profile.
Connected your base and rover.
Opened a new or existing project.
Created or localized your control point.
Best Practice: You can use your rover’s location during the Position and Rotate steps, but creating these reference points ahead of time makes it easier to position and align your shapes accurately.
Step-by-Step Instructions
Step 1 — Open the Shape layout Tool
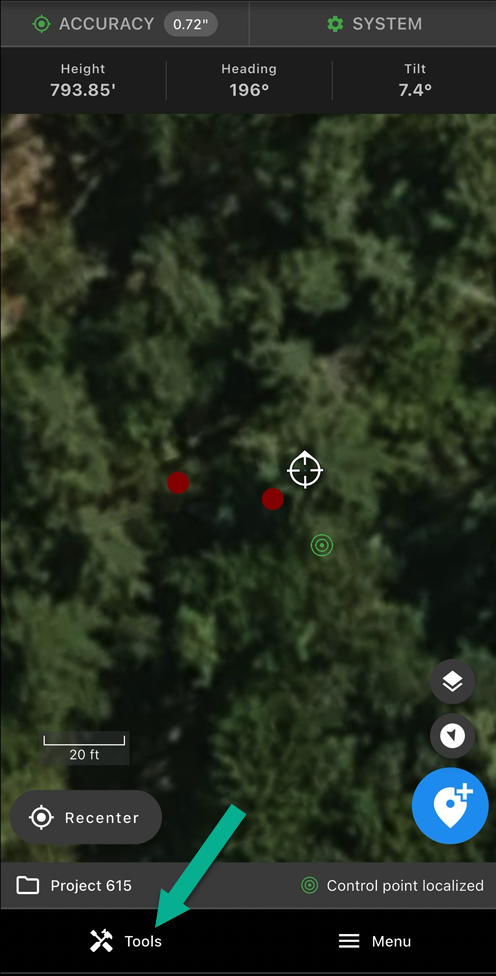
Tap Tools at the bottom of the screen.
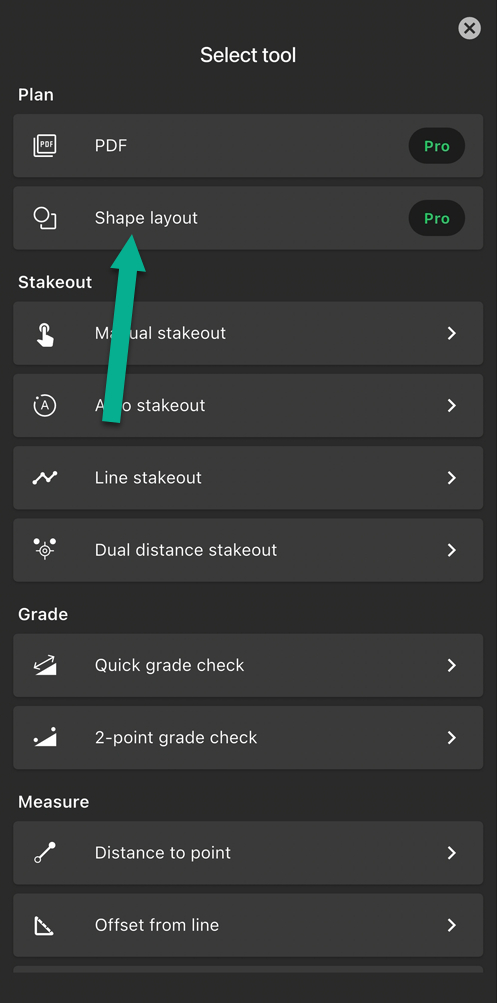
Tap Shape layout.
Step 2 — Select Your Shape and Color
Select the type of shape you want to create:
Rectangle
Line
Circle
The app automatically assigns the default color to your shape.
To use a different color, tap the color and use the sliders to make your selection.
Tap Continue.
Step 3 — Enter the Dimensions
Enter the dimensions for your selected shape:
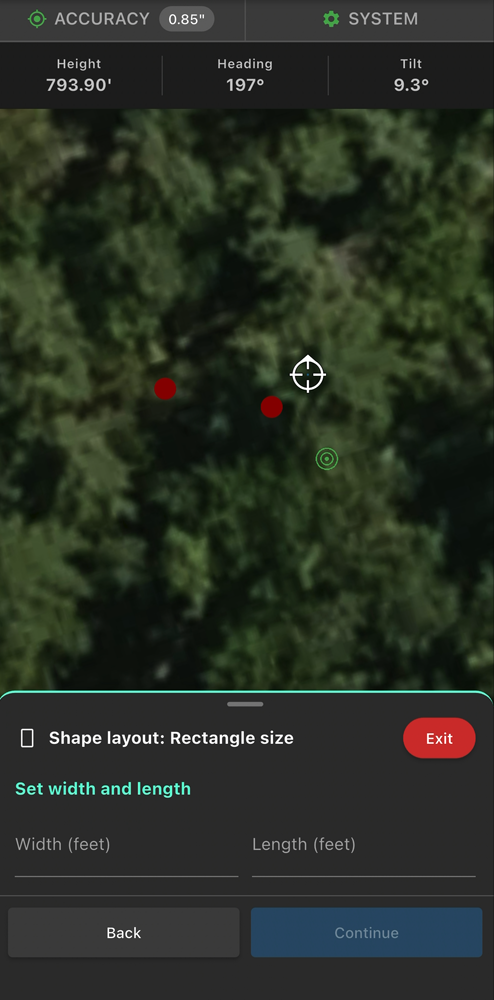
Rectangle: Enter the width and length.
Line: Enter the line length.
Circle: Enter the radius.
The shape updates dynamically as you enter the dimensions.
Tap Continue.
Step 4 — Position Your Shape
The positioning process varies depending on the shape you're creating.
Rectangle
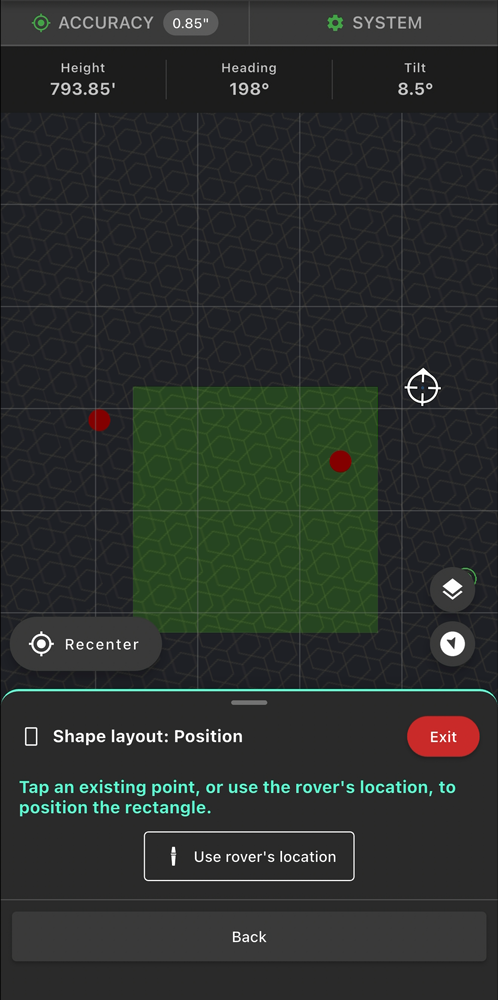
Select the corner of the rectangle you want to use as your positioning point.
Next, select an existing project point or tap Use Rover's Location to position that corner at your rover's current location.
The rectangle moves to the selected location.
Tap Continue to confirm the position.
Line
Select the endpoint of the line you want to use as your positioning point.
Next, select an existing project point or tap Use Rover's Location.
The line moves to the selected location.
Tap Continue to confirm the position.
Circle
Select an existing project point or tap Use Rover's Location to position the center of the circle.
The circle moves to the selected location.
Tap Continue to confirm.
Note: Because a circle does not require rotation, you'll move directly to the Review step.
Step 5 — Rotate Your Shape
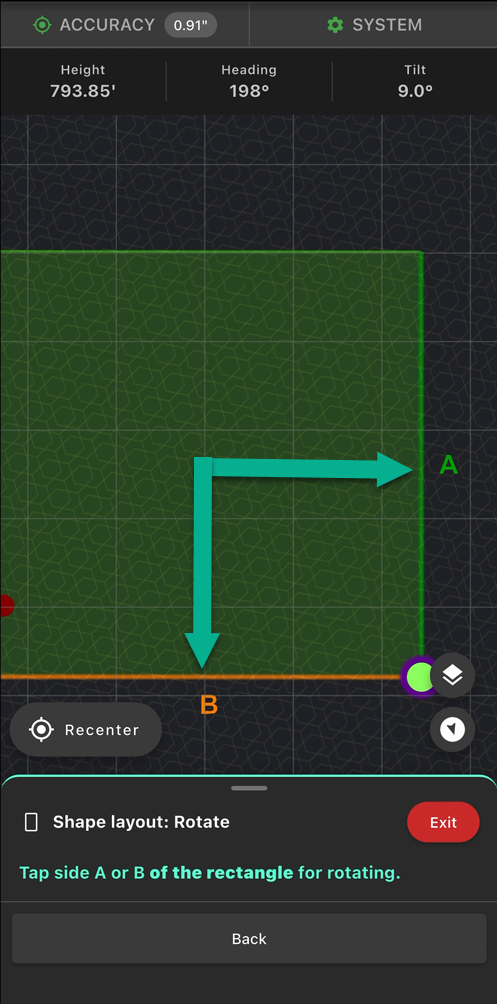
Rectangles and lines must be rotated after they're positioned.
Rectangle
Select Side A or Side B to choose which side of the rectangle you want to rotate.
Next, select an existing project point or tap Use Rover's Location to establish the direction of that side.
The rectangle rotates to align with the selected location.
Tap Continue to confirm the rotation.
Line
Select an existing project point or tap Use Rover's Location to establish the direction of the line.
The line rotates to align with that location.
Tap Continue to confirm the orientation.
Step 6 — Review Your Shape
Review the shape information before completing the process.
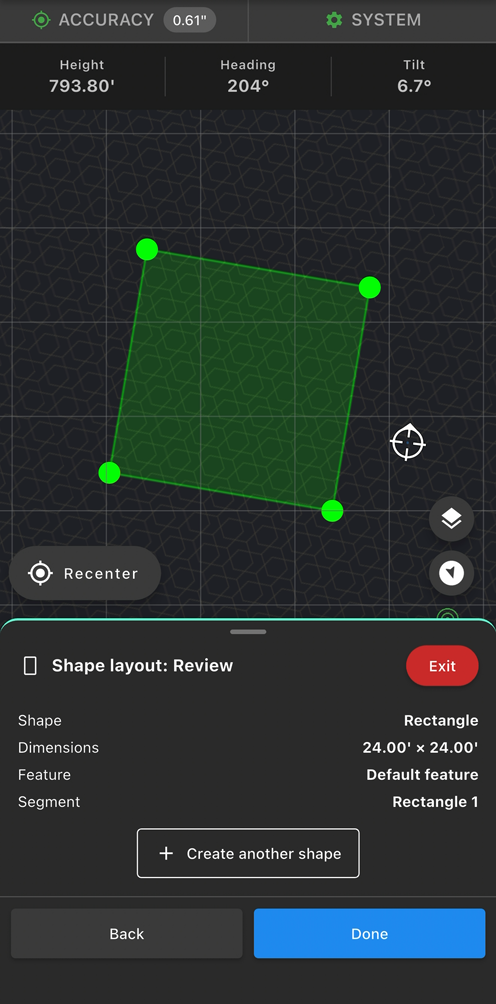
The Review screen displays:
Shape type.
Dimensions.
Feature.
Segment name.
Tap + Create Another Shape to continue building your layout, or tap Done to finish.
Your completed shape will appear on the project map.
Adding to an Existing Shape
You can use the points created by an existing shape to position and rotate additional shapes. This is useful when building more complex layouts, such as an L-shaped building made from two rectangles.
There are two ways to create an additional shape:
Tap + Create Another Shape from the Review screen after creating your first shape.
Open Shape layout again from the Tools menu.
Create your next shape and enter its dimensions as usual.
During the Position step, select a point from the existing shape to position the new shape.
During the Rotate step, select another point from the existing shape to align the new shape with it.
This allows you to connect multiple shapes while maintaining precise dimensions and alignment.
Using Shape layout in No Sensor Mode
You can also use Shape layout in No Sensor Mode to prepare your layout away from the jobsite.
Before leaving the jobsite, make sure you have established your control point and dropped the points you'll need to position and rotate your first shape.
You can then open the project in No Sensor Mode from home or the office and use those existing points to position and rotate your shape.
Once you've created your first shape, you can use the points generated by that shape to position and rotate additional shapes.
Managing Shapes
You can manage shapes from the Layers menu on the project map.
Tap the Layers button to open the menu.
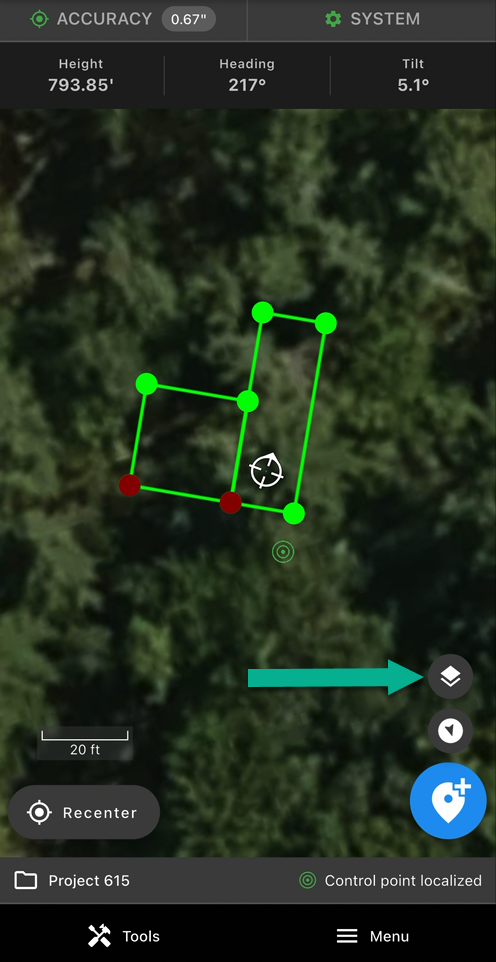
By default, new shapes are created under the Default feature. Tap the arrow next to the feature to view the individual segments within it.
From here, you can:
Show or hide a shape: Check or uncheck the box next to the segment.
Make a segment active: Press and hold the segment and select Activate to make it active. Any new points you drop will be added to the active segment.
Edit a segment: Press and hold the segment and tap Edit. You can rename the shape, change the point naming prefix, or change its color. Tap Save when finished.
Delete a segment: Press and hold the segment and select Delete to remove it.
Was this article helpful?
That’s Great!
Thank you for your feedback
Sorry! We couldn't be helpful
Thank you for your feedback
Feedback sent
We appreciate your effort and will try to fix the article