
Overview
This article explains how to import PNEZD or PENZD point data from a CSV file into the Kinsman SitePoint app, align the imported points with your jobsite, and use them within your project.
If you've never worked with PNEZD or PENZD data before, we'll also explain what it is and how you may be able to get it from your surveyor or engineer.
What is PNEZD / PENZD?
PNEZD and PENZD describe how point data is organized within a CSV file. They are widely used point-data conventions in surveying and civil construction.
They are not separate file types. The file you import into the Kinsman SitePoint app is a CSV (.csv), and PNEZD or PENZD identifies the order of the columns within that file.
Each row in the CSV represents a point, with each column containing information about that point.
The letters indicate what each column contains and the order in which the information appears:
P - Point: The point number or name
N - Northing: The north-south coordinate
E - Easting: The east-west coordinate
Z - Elevation: The elevation of the point
D - Description: A description or code for the point
A PNEZD CSV organizes its columns as:
Point, Northing, Easting, Elevation, Description
A PENZD CSV organizes them as:
Point, Easting, Northing, Elevation, Description
Both contain the same types of point information. The difference is the order of the Northing and Easting columns.
This point data may include locations such as building corners, property markers, utilities, or other features on the jobsite. Importing the CSV into the Kinsman SitePoint app allows you to bring these points directly into your project without creating each point manually.
Below is a sample of what a PNEZD formatted CSV file would look like: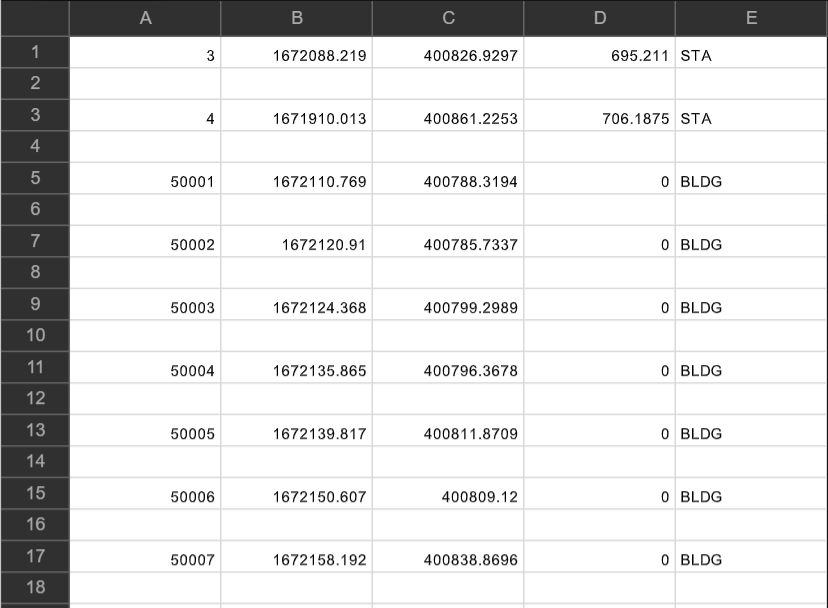
How to Get PNEZD / PENZD Point Data
PNEZD or PENZD point data may be available from the surveyor or engineer who prepared your project plans.
If you don't already have the point data, ask whether they can provide a CSV containing PNEZD or PENZD point data for the project.
Once you receive the CSV, save it somewhere accessible from the mobile device running the Kinsman SitePoint app.
Before You Begin
Before you start, make sure you have:
Your base and rover set up and initialized.
An established control point.
The CSV file is saved in a known location on your mobile device.
Two points included in the CSV that you can also identify at the jobsite.
Step-by-Step Instructions
Step 1 — Prepare Your Project
Before importing your CSV file, identify two points included in the CSV that can also be located on the jobsite.
Whenever possible, choose points that are far apart from one another, especially when working across a large jobsite.
Using your rover, locate each reference point on the jobsite and drop a point at each location in the Kinsman SitePoint app.
You'll use these points later to position and rotate the imported point data so it aligns with the jobsite.
Step 2 — Access the PNEZD / PENZD import tool
Step 2 — Access the CSV Import Tool
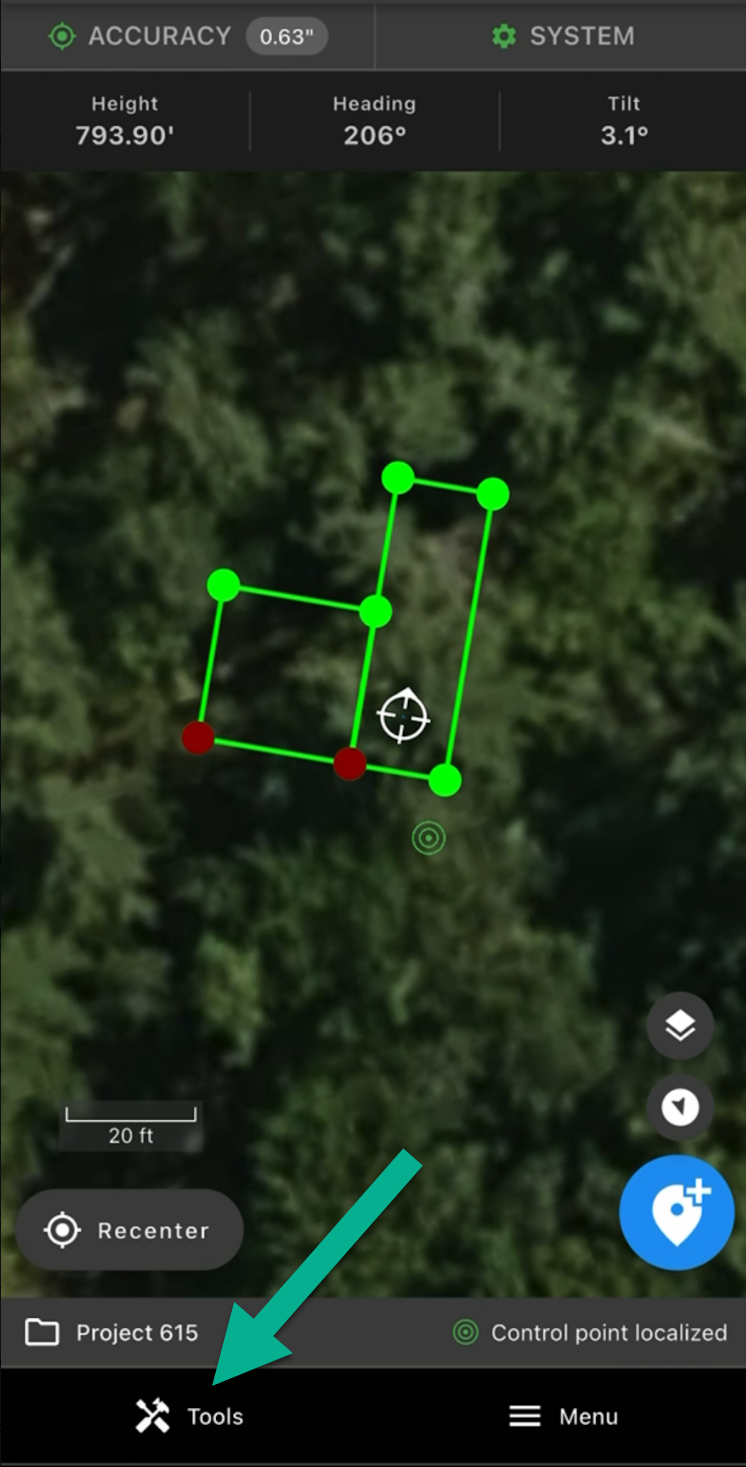
From the map screen, tap Tools.
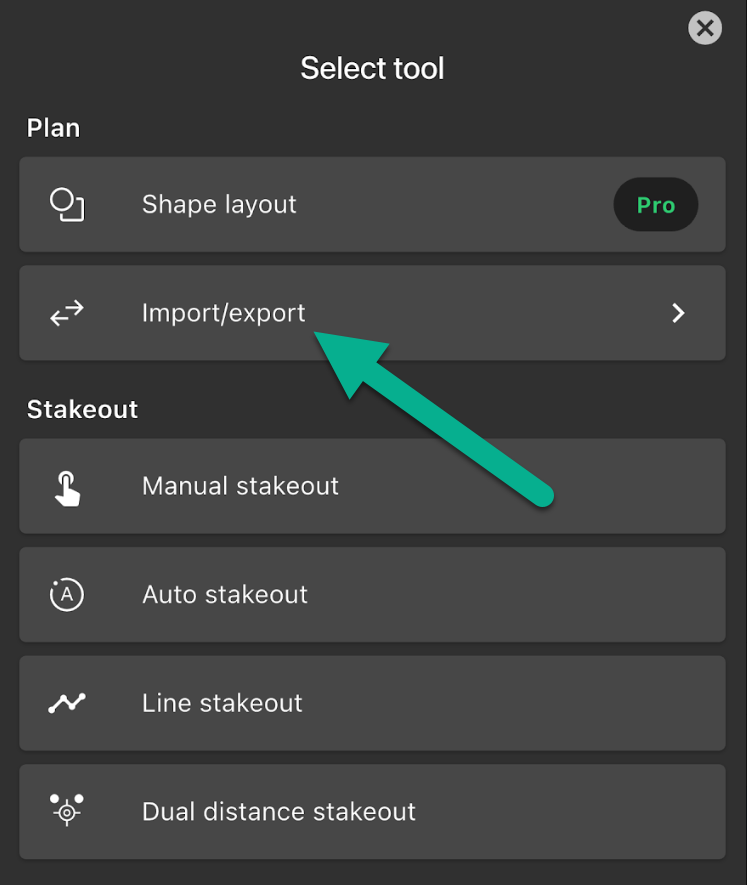
Tap Import/export.
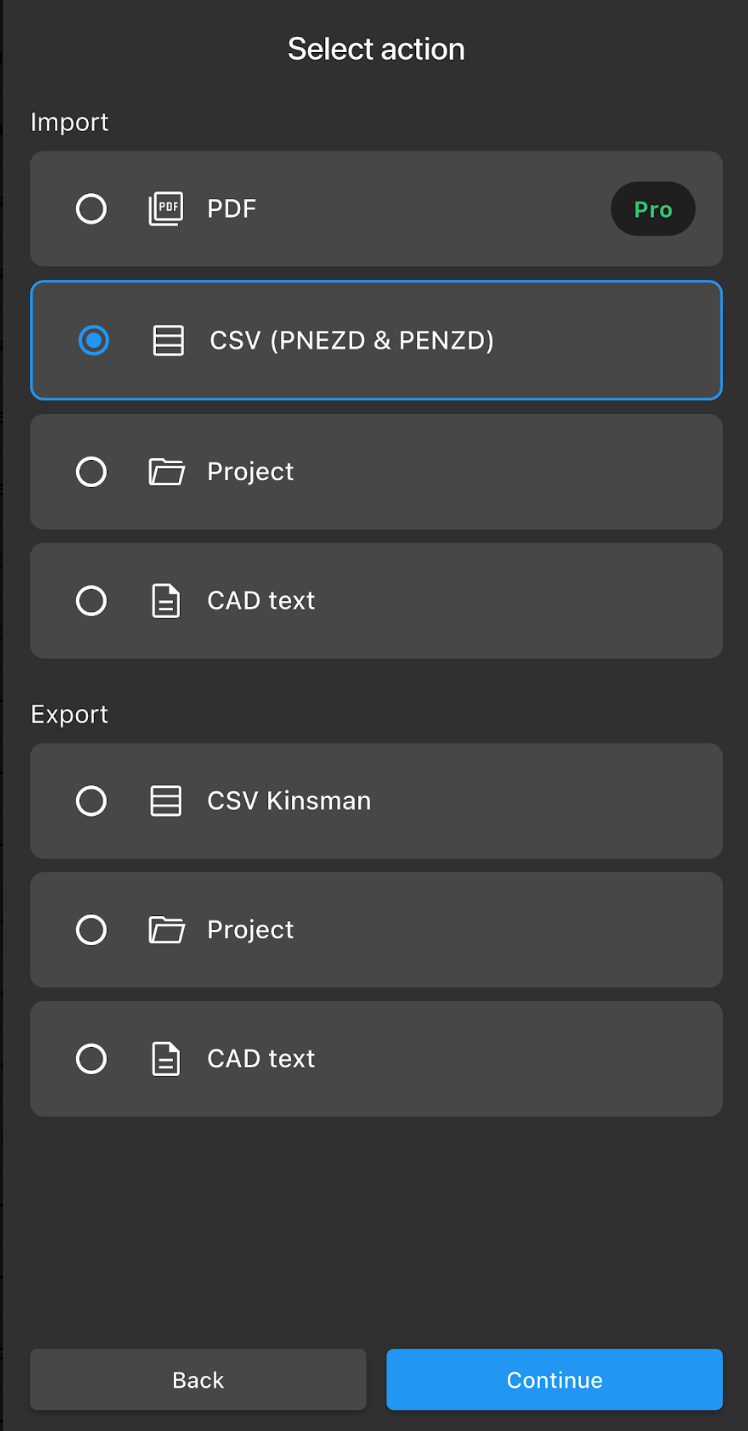
Select CSV (PNEZD & PENZD), then tap Continue.
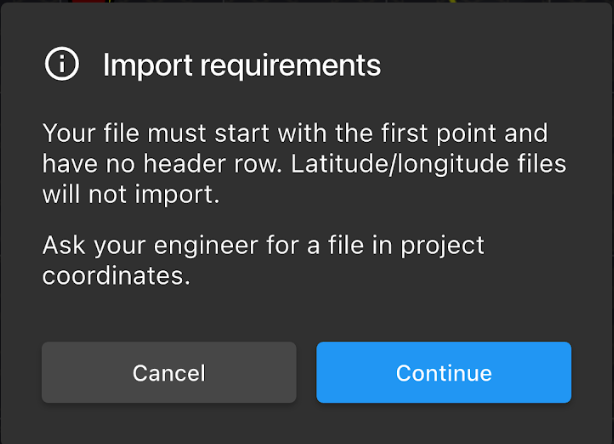
The app will display the import requirements for a PNEZD or PENZD CSV. Review the requirements, then tap Continue.
Step 3 — Select Your CSV File
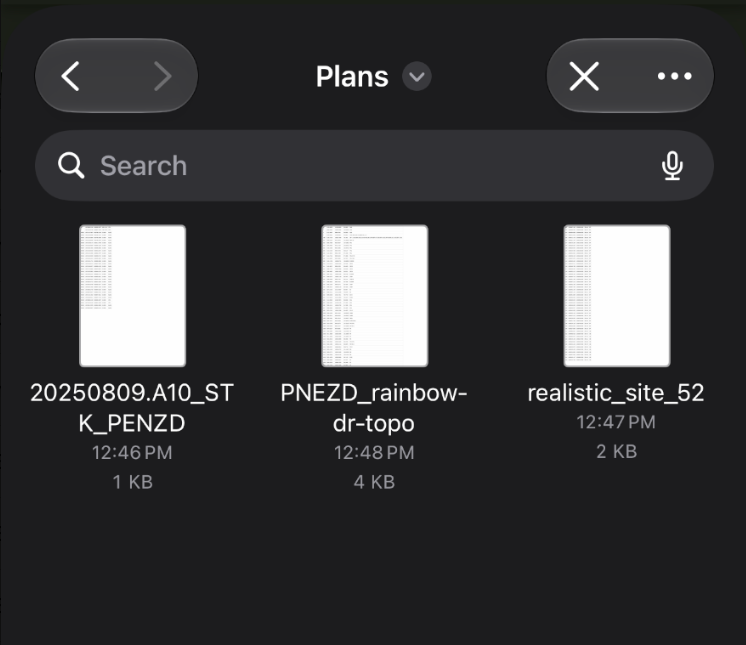
Use your device's file browser to locate and select the CSV file you want to import.
Step 4 — Select the Column Order and Units
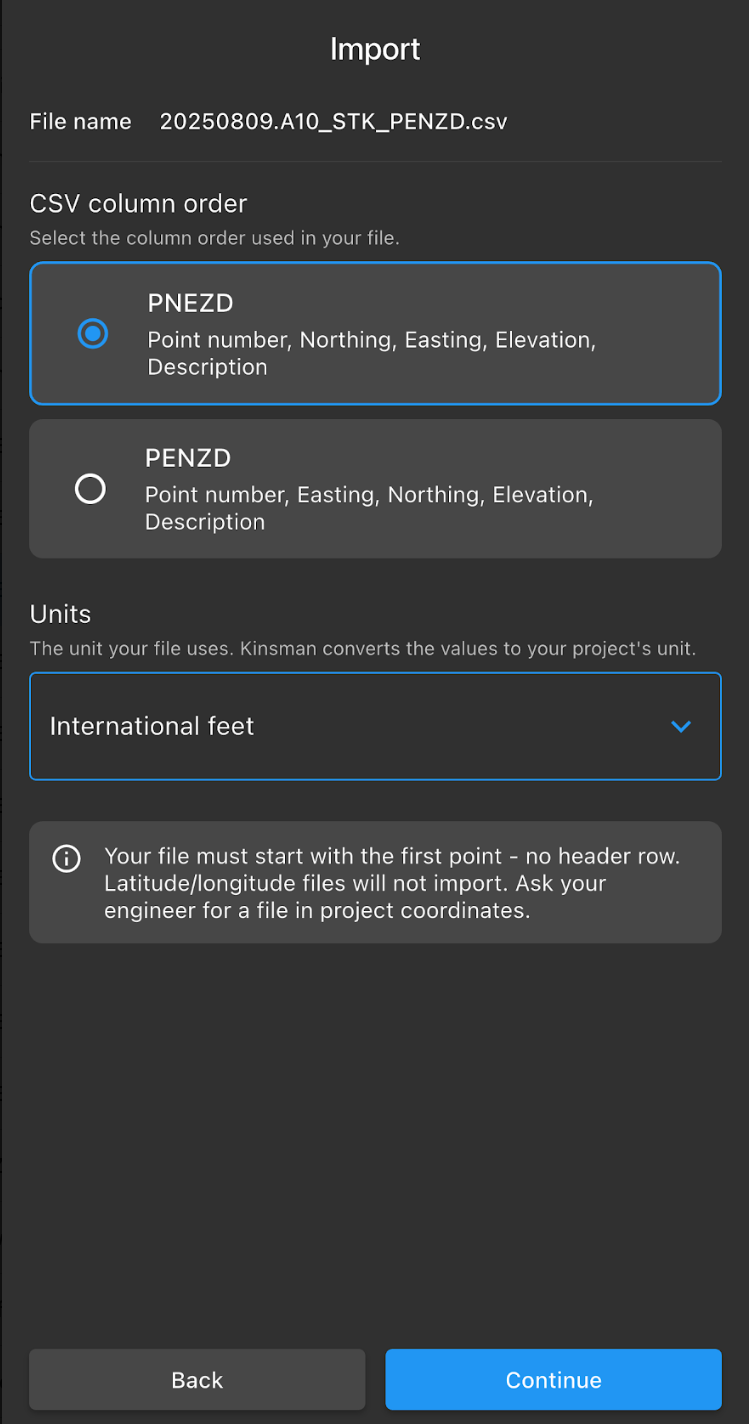
Select the column order used by your CSV:
PNEZD: Point, Northing, Easting, Elevation, Description
PENZD: Point, Easting, Northing, Elevation, Description
Next, select the units used by the point data:
International feet
US survey feet
Meters
After you've made your selections, tap Continue.
Review the Import Summary
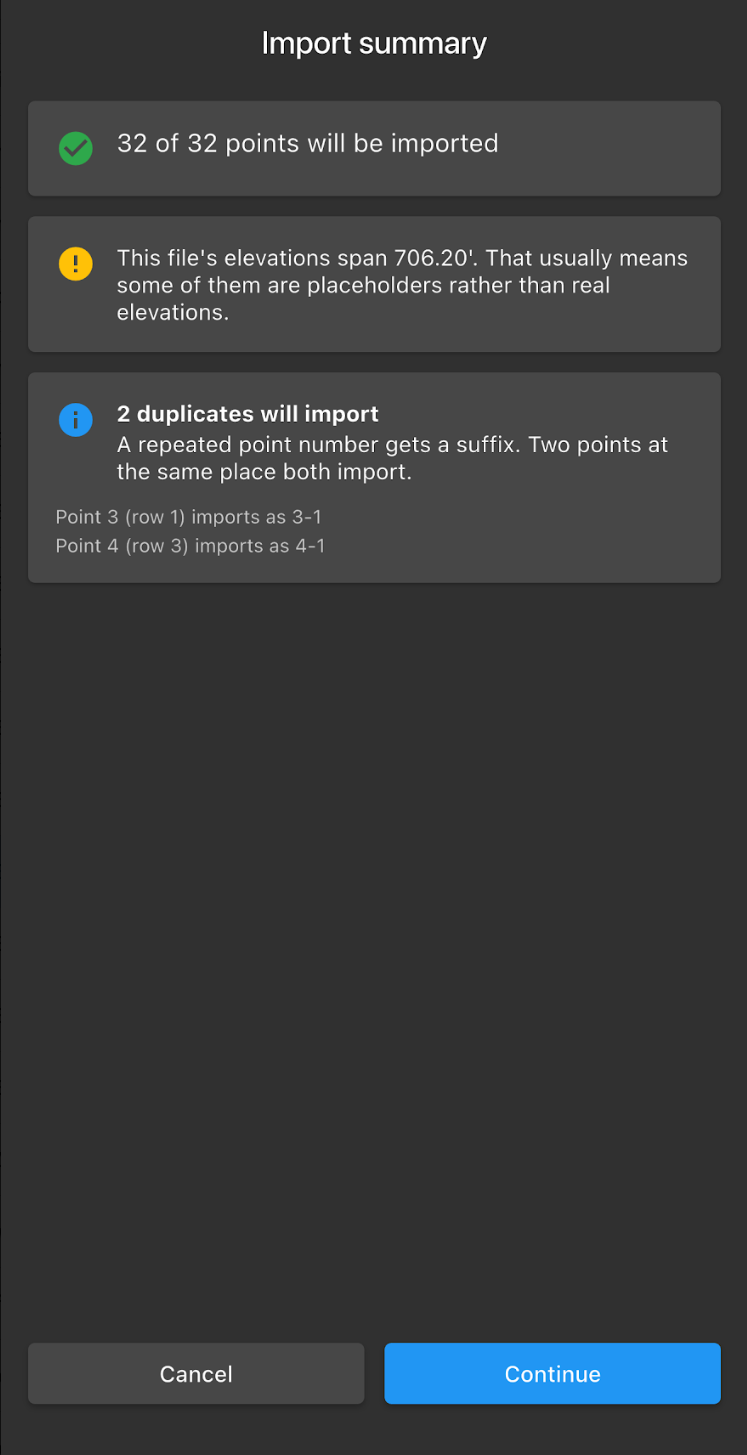
The Import summary shows information about the point data you're about to import, including:
The number of points being imported.
Information about the elevation data.
Any duplicate point names and how they'll be renamed during the import.
Review the summary, then tap Continue.
Step 5 — Place Your Points on the Map
The app will display an overview of the points you're importing.
From here, you can select the color of the imported points and choose whether to display the enclosing rectangle and point numbers.
Tap Continue to proceed.
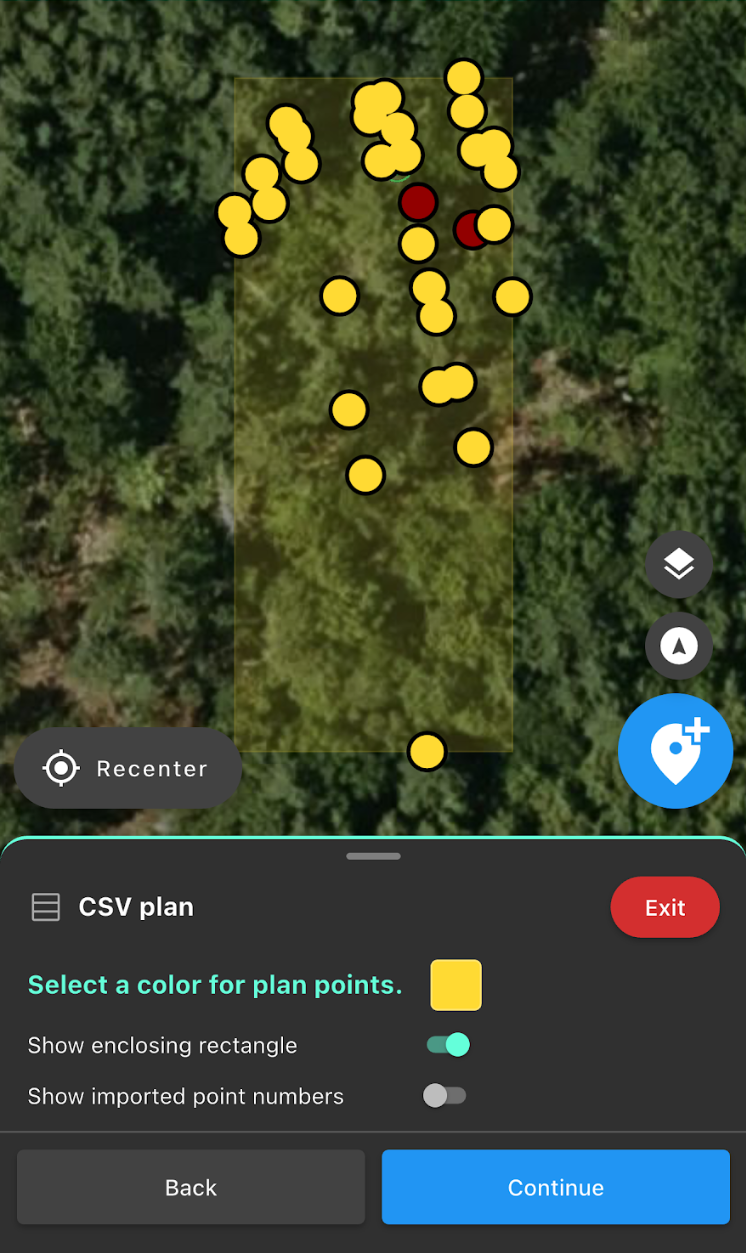
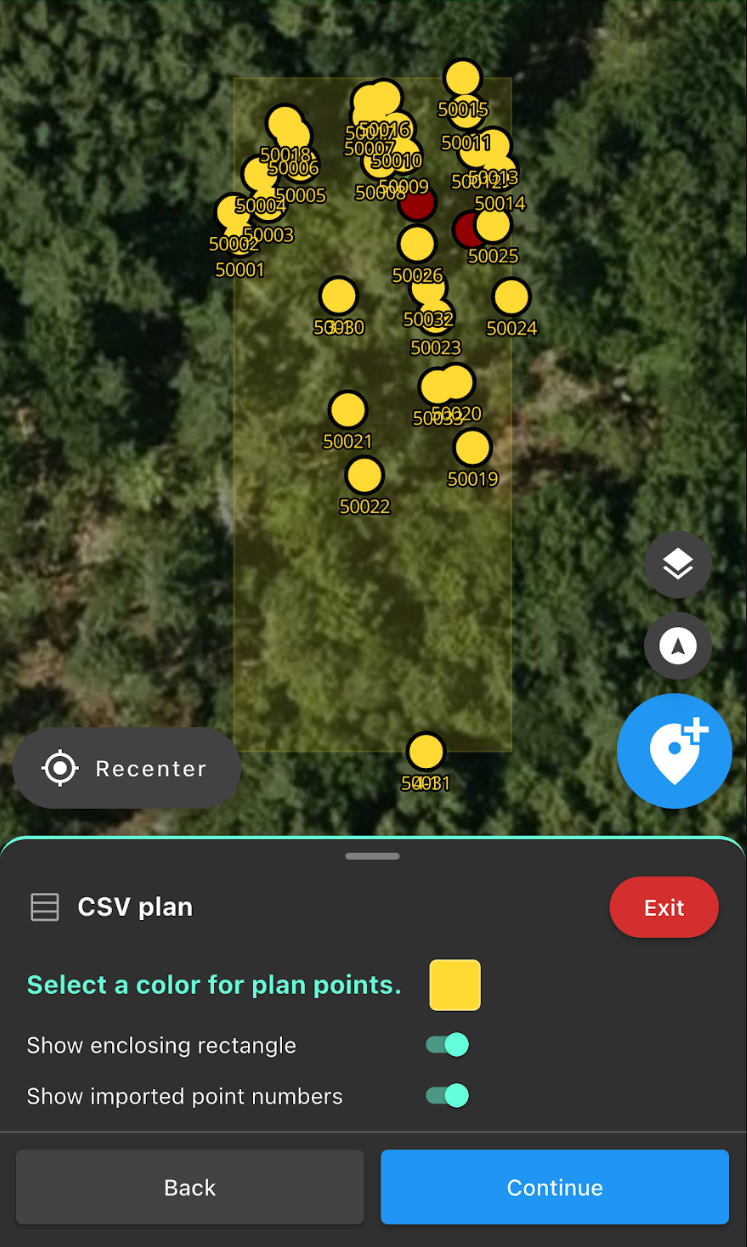
Point numbers off Point numbers on
Position the Imported Points
Next, select your Position point.
Choose a point from the imported point data that you can also locate on the jobsite. This could be a survey pin or a point on an existing feature.
Tap the point you want to use.
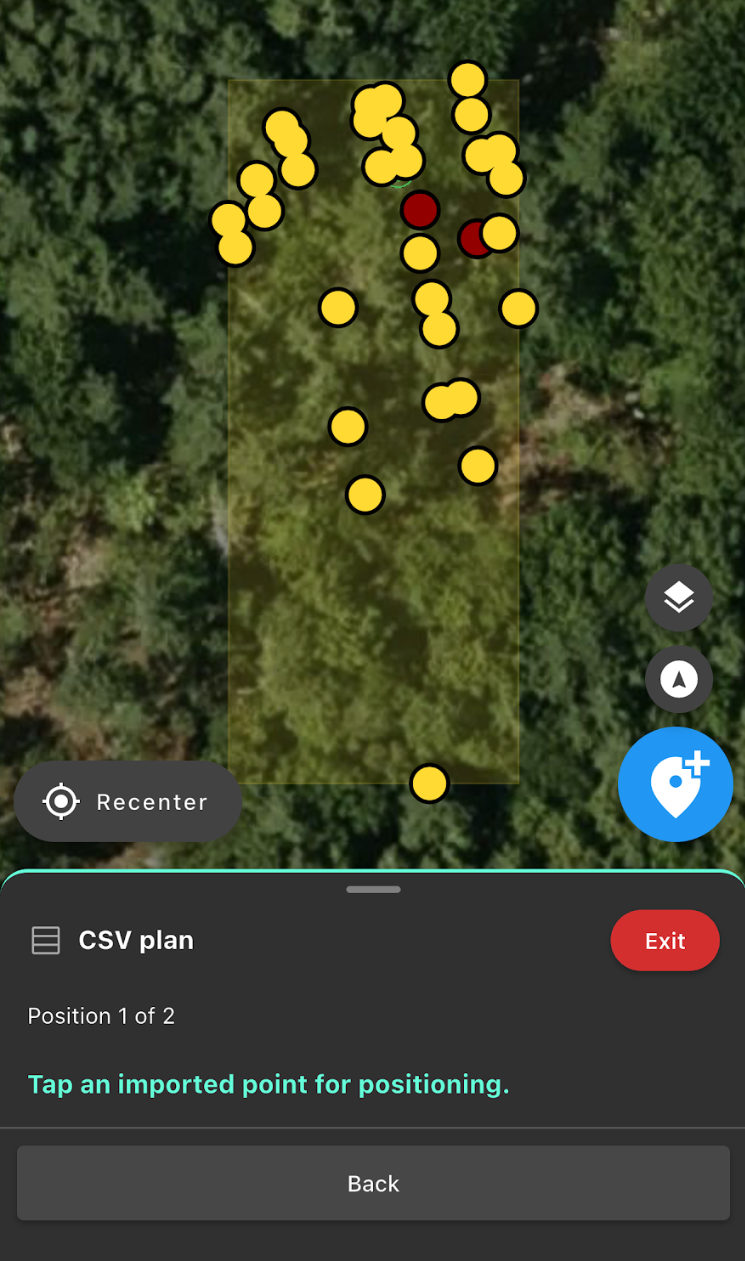
Next, select the corresponding existing point on your project map. The imported point data will move to align your selected Position point with the project point.
If you didn't create a project point at that location, you can physically move your rover to the reference location, position the survey pole precisely over the point, and tap Use Rover's Location.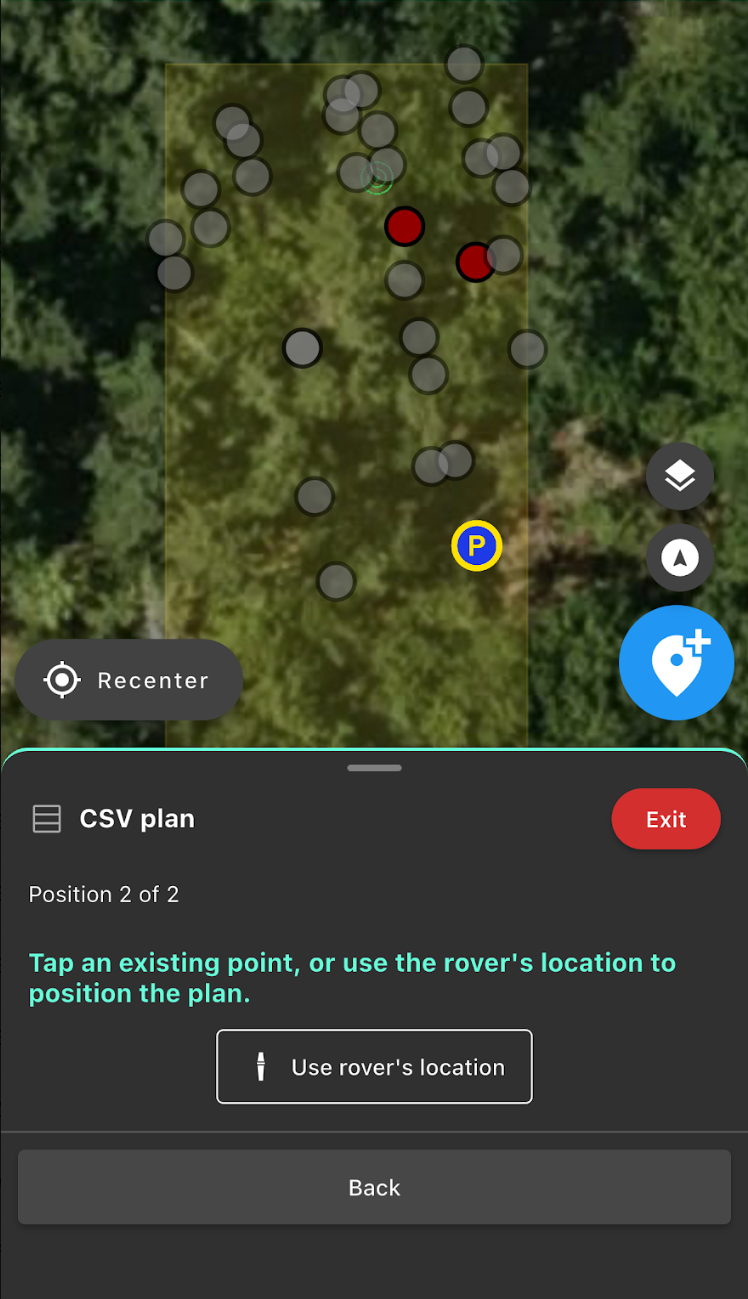
Rotate the Imported Points
Next, select your Rotate point. This second point is used to establish the orientation of the imported point data on your jobsite.
Choose another point from the imported point data that you can also locate on the jobsite, then tap the point to select it.
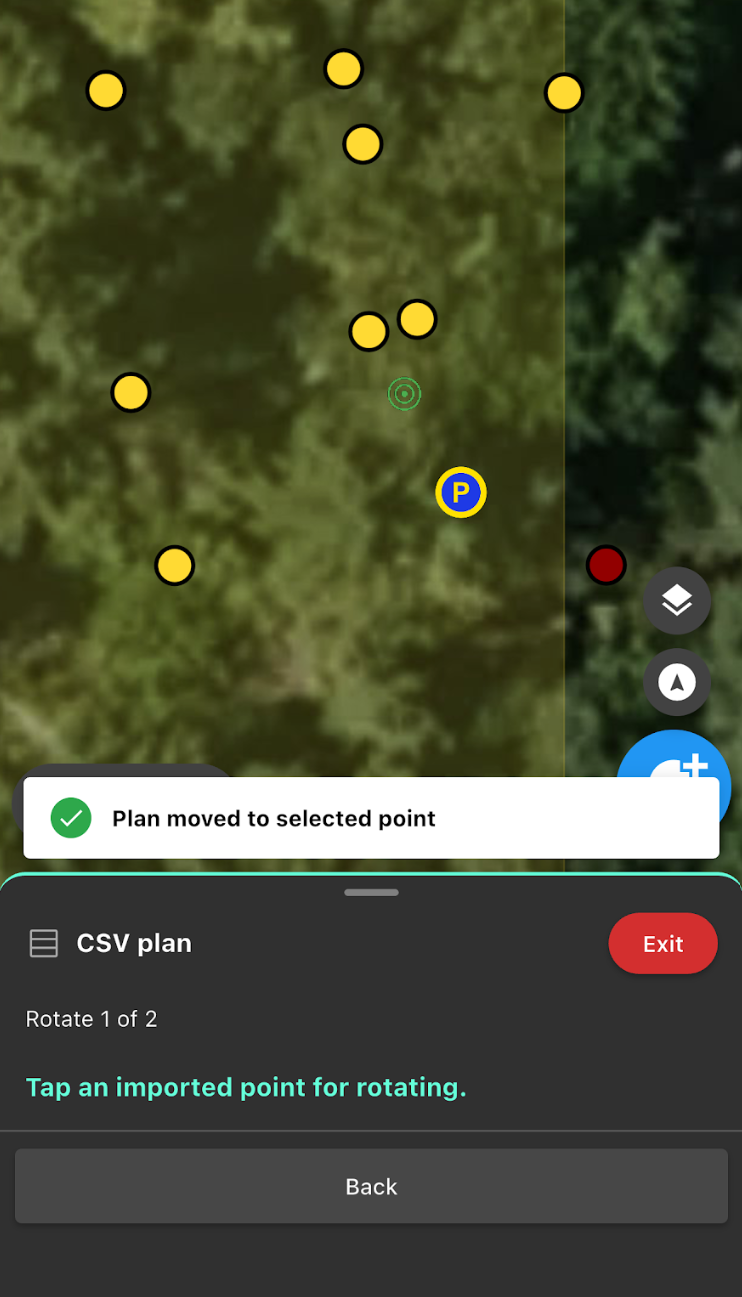
Next, select the corresponding existing point on your project map.
If you didn't create a project point at that location, move your rover to the reference location, position the survey pole precisely over the point, and tap Use Rover's Location.
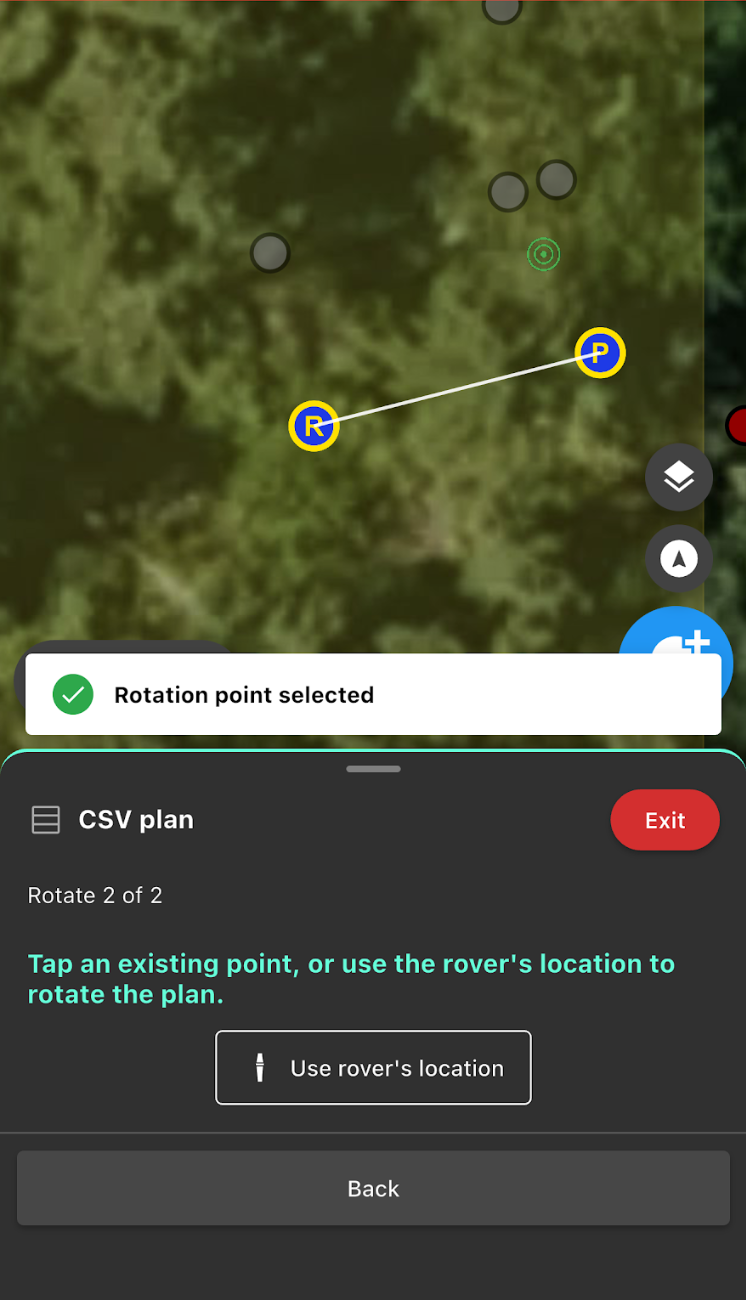
Best Practice: Whenever possible, choose a Rotate point that is as far as practical from your Position point. A greater distance between the Position and Rotate points helps improve alignment across the jobsite.
Step 6 — Choose the Elevation for Your Imported Points
The final step is choosing how elevations will be handled for the imported points.
You can choose to:
Keep the imported elevations: The points will retain the elevation data contained in the CSV. The app will display a summary of the elevation range included in the imported points.
Match the Position point: The imported points will be adjusted to match your selected Position point.
Select the appropriate option for your project.
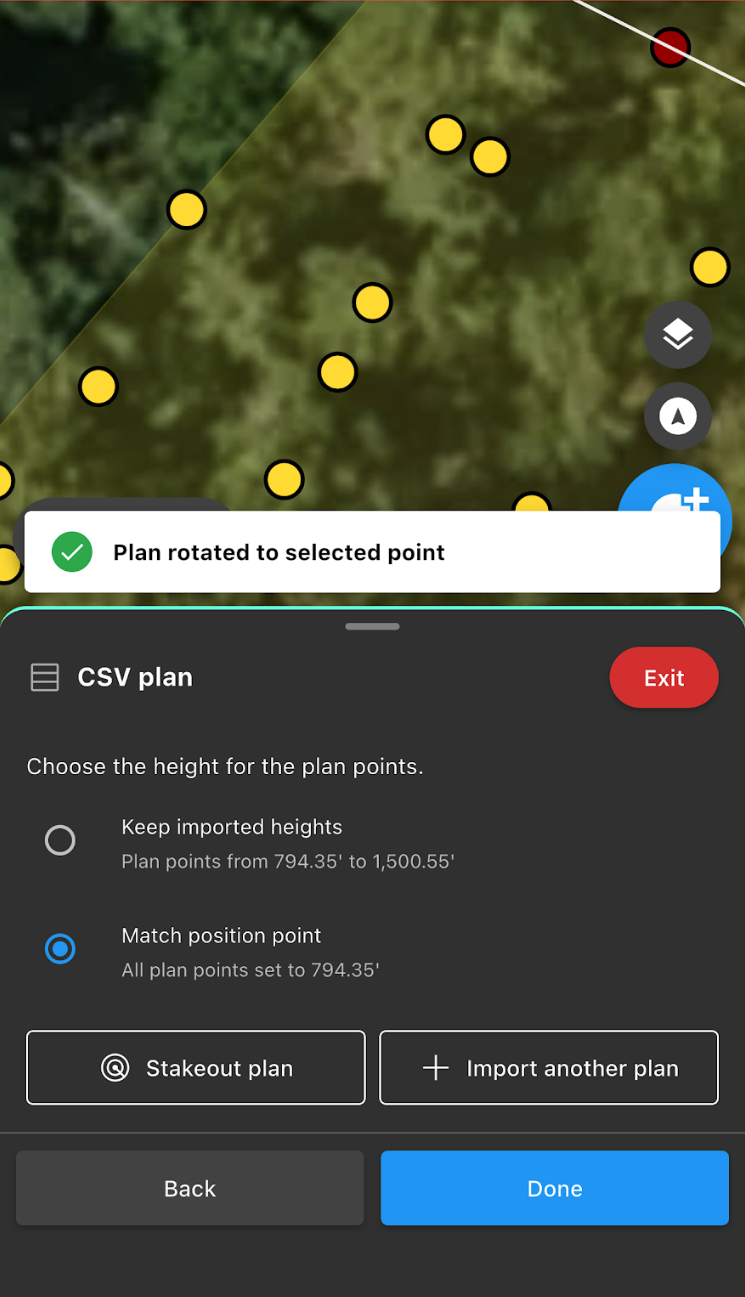
Here you can also tap Stakeout plan to begin staking out the imported points.
You can also tap + Import another plan to import another CSV into your project.
Tap Done to complete the import.
Using Your Imported Points
Once your CSV has been imported, each imported point can be used like other points in your project.
For example, you can:
Use Stakeout to locate imported points on the jobsite.
Use measuring tools with the imported points.
Use imported points to position and rotate PDF plans or shapes.
Note: Some tools and features, including PDF import and Shape layout, require a Pro subscription.
Was this article helpful?
That’s Great!
Thank you for your feedback
Sorry! We couldn't be helpful
Thank you for your feedback
Feedback sent
We appreciate your effort and will try to fix the article